Sunday, March 29, 2015

rainbow cookies


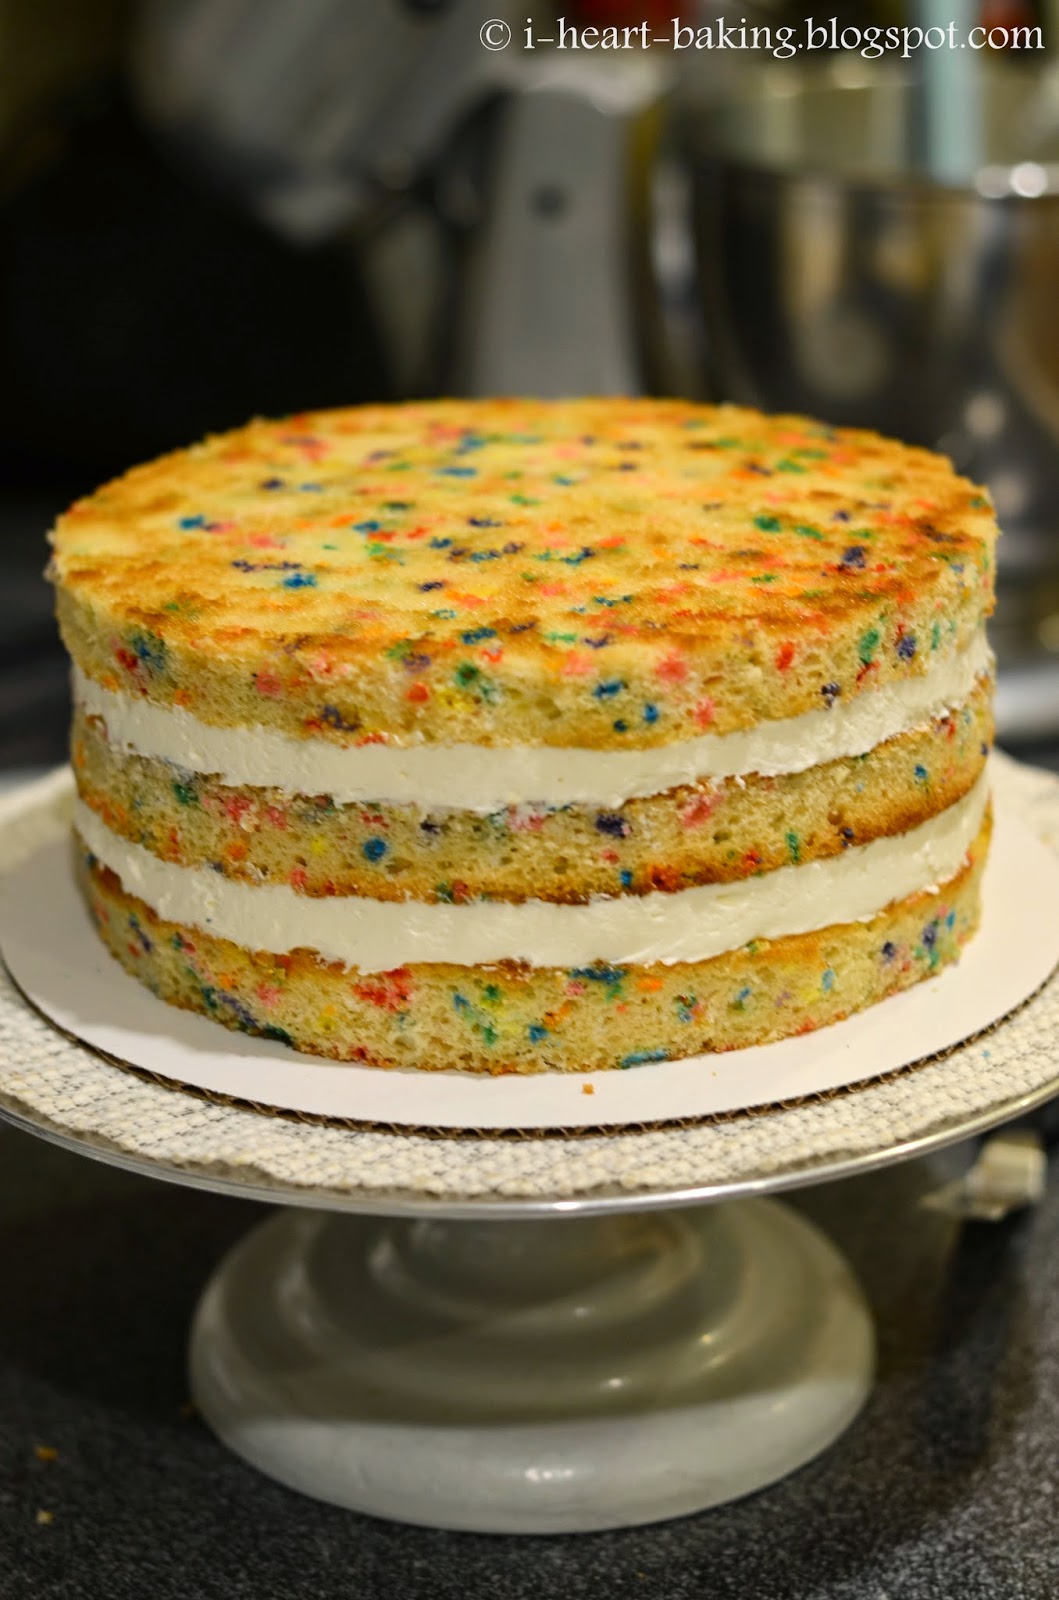
My friend Helen was throwing a birthday party for her daughter Marni's 2nd  birthday, and to go along with her requested naked funfetti birthday cake and Pink Panther cookies, I also made these rainbow cookies!


Since I didn't have any rainbow cookie cutters, I had my talented husband made me a custom copper cutter, as he often has.


For the cookies, I made a couple of batches of my sugar cookie dough (recipe in my book, The Hello Kitty Baking Book!), and let them chill in the fridge for 30 minutes before rolling them out and stamping out my rainbow cookies. After they had baked and cooled, I made my royal icing and got to work with the piping!


I started by piping my cloud outline with stiff white icing, and then filling it in with runny white icing.


Then came the rainbow part! I used stiff icing to pipe the borders of my rainbow colors ...


... and then filled them in with runny icing. But in the end this method was very time consuming and I ended up using a ton of piping bags (for the stiff icing) and squeeze bottles (for the runny icing). I think if I were to make these again, I would just use a really wide tip in a piping bag with medium icing - not so runny that it would run off the cookies, but not so stiff that it doesn't move. That way I would only have to pipe each color once!


But, they turned out pretty cute anyway. I mean, how can cookies with rainbows and clouds on them not be cute?!


Wheeeeee!


Monday, March 23, 2015

naked funfetti layer cake


My good friend Helen asked me to make two cakes for her daughter's birthday this year - one was a Qiaohu tiger cake for her preschool class, and then second was for her birthday party! For the second cake, she had a specific look in mind. She wanted a naked layer cake, and she wanted it to look like Momofuku Milk Bar's birthday cake, except with my own vanilla cake recipe, filled with fresh strawberries and whipped cream, and minus the birthday cake crumbles. So cute!


For the funfetti cake I used the vanilla cake recipe in my book, The Hello Kitty Baking Book, and folded in 2/3 cup of rainbow sprinkles at the end. (I also sprinkled on a few on top before baking, for good measure). I made two batches of cake batter to give me four 8-inch cake layers, although I only ended up using three of the layers.


I normally split my cake layers horizontally into two, but this time I wanted thicker layers - since it was going to be a naked cake and was not going to have frosting on the outside, I wanted the cake layers to really stand out. So I just cut the tops off of each layer, and then cut off the sides of the cake to expose the funfetti sprinkles inside. (Otherwise, you would just see brown cake layers with drippy funfetti - see this post to get an idea of what it looks like without the sides cut off).


I filled each funfetti cake layer with a good dose of freshly whipped cream and sliced fresh strawberries, and then used an offset spatula to go around the cake and smooth out the filling layers.


After I stacked and filled all three layers, I covered the top with cream cheese frosting, and used an offset spatula to create a rustic swirly design on the top of the cake.


Since Helen was going to have 60 people at the party, I also baked up a second cake, this time covered in frosting and with the number "2" outlined in sprinkles.


At the party, we added two long pink candles for the birthday girl to blow out.


Here's a shot of the inside of the cake, and also the Pink Panther cookies and rainbow cookies that I made for the party as well! (Posts to come for those cookies!)


Hope you enjoyed your cake and cookies, sweet Marni! You are TOO CUTE!


Sunday, March 15, 2015

matcha green tea ruffle cake


Just in time for St. Patrick's Day, this green cake would be perfect! (Especially since it kind of resembles a head of cabbage!) But actually, I didn't make this for St. Patrick's Day, I made it for my coworker Kim, who loves anything green tea! For the past few years I've been baking her green tea birthday cakes. Last year's was this green tea rose cake, and she liked it so much that I thought I'd make it for her again this year! But this time instead of piped roses, I decided to do a ruffle cake piped to resemble one large flower!


The green tea cake is a chiffon-style batter, with whipped egg whites to lighten it, and plenty of green tea powder to give a strong green tea flavor.


I baked my batter in two 8-inch cake pans, and once cooled I made a large batch of freshly whipped cream, which I then flavored with a paste made of green tea powder mixed with hot water.


Then I filled my cake layers, and covered the tops and sides of my cake with the whipped cream.


Then came the fun part - piping the ruffles! I used a Wilton #104 petal tip and started my ruffles in the center of the cake, using my turning cake stand to turn the cake while I piped.


Then I just kept piping ...


... and piping, until I had covered the top of the cake with petals. 


At this point, I thought it looked quite pretty, and considered stopping and leaving it as is. I really liked the look of the ruffles on top of the cake with the straight sides.


But then I decided that I needed to keep going with my original plan to pipe ruffles all over the entired cake!


I'm so glad that I did, because the finished the cake came out so pretty! So girly, frilly and ruffly!


Hope you enjoyed the cake, Kim! Happy Birthday!

Sunday, March 8, 2015

qiaohu tiger cake


My friend Helen asked me to make a Qiaohu tiger cake for her daughter Marni's 2nd birthday, for her class party at preschool. Even though I had never heard of Qiaohu before, I of course agreed right away! Anything for Marni! Especially since I wasn't able to make her a cake for her 1st birthday last year (I was so busy baking for the book!)


For the cake itself, Helen requested the same cake that I had made for her baby shower - fluffy vanilla cake filled with fresh strawberries and whipped cream! So I baked up a batch of vanilla cake (recipe in my book, The Hello Kitty Baking Book!) in two 8-inch pans, and once they had cooled I split them in half horizontally (giving me four cake layers, although I only ended up using three of the layers).


Then between each cake layer I spread on freshly whipped cream and fresh sliced strawberries.


For Qiaohu's ears, I had baked up a half dozen vanilla cupcakes with the same batter. I sliced the tops off of four cupcakes, and filled them with freshly whipped cream.


Then I did a quick crumb coat of the cake and cupcakes with cream cheese buttercream (tinted golden yellow), sliced off a bit of the stacked and frosted cupcakes, and fit them onto the cake as ears. Then I used a toothpick to draw on Qaiohu's details before piping the outlines with black and white frosting.


Next was filling in the details with piped stars for the face and ears, piped lines for the tiger stripes, and a piped swirl of ovals for the eyes.


After a piping a bit of brown frosting for the nose, he was done!


What kid can resist a cute winking tiger smiling back at you?


I also piped a quick birthday message on the cake board to complete the cake! ("yuan yuan" is her nickname!)


Hope you had a happy birthday, Marni!