Showing posts with label poms. Show all posts

Saturday, November 8, 2014

large pastel hello kitty pom pom cake


Last weekend was Hello Kitty's 40th birthday! (It was on November 1st, to be exact!) I was lucky enough to be a part of her birthday celebration by giving a cookie decorating workshop at the first ever Hello Kitty Con, a 4-day extravaganza featuring Hello Kitty products, pop-up shops, food, fashion, workshops, panels, art exhibits, and so much more!

I'll have more details on Hello Kitty Con in a later post, but in honor of Hello Kitty's birthday I thought it would be the perfect time to share this pastel pom-pom cake with you! I actually made it for my friend Monica, for her daughter Izzy's birthday party. It was inspired by a previous pastel pom cake that I had made for my daughter Melodie, but this time I made a large 10-inch chocolate cake, which I filled with chocolate mousse.


Once the cake and filled mousse had chilled in the fridge overnight, I whipped up two batches of cream cheese frosting (recipe in my book!), and did a quick crumb coat all over the sides and top of my assembled cake.


Then I colored part of my frosting black, and piped a large Hello Kitty on the top of my cake.


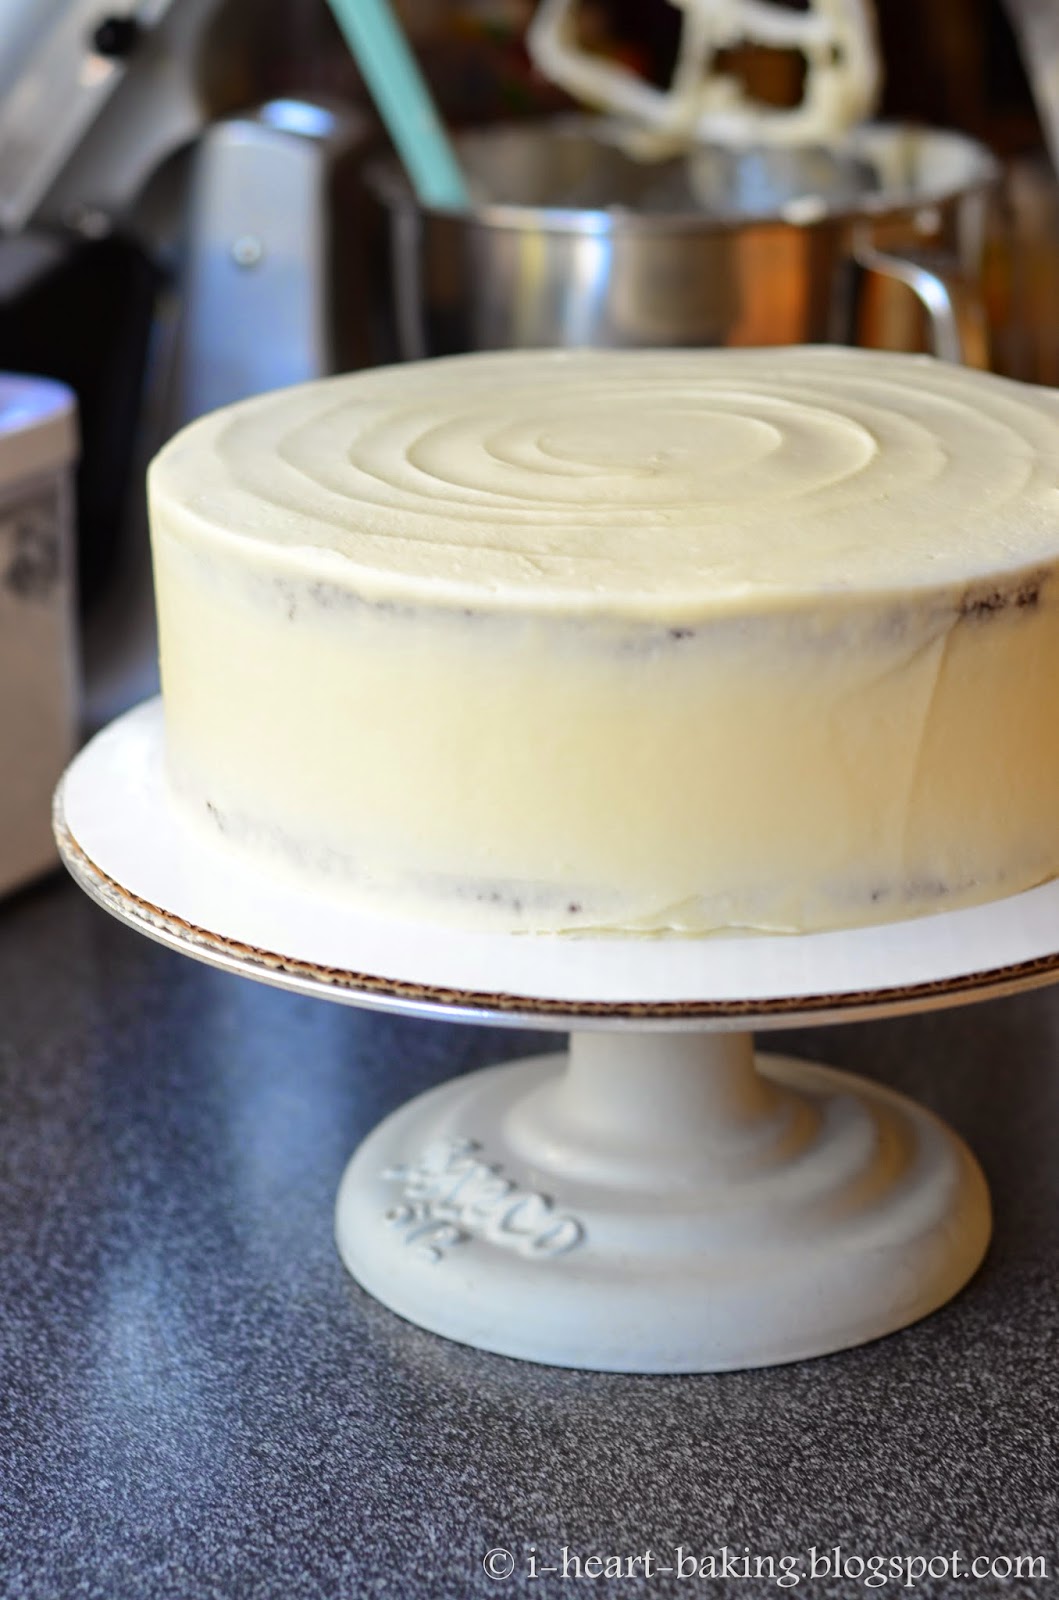
I divided the rest of my frosting (after setting aside a bit of white frosting to be used later), and colored them all different shades of pastel colors.


Then I used a medium star tip to fill in the bow with pink frosting, and the face with the reserved white frosting.


Once I filled piping bags with the rest of the colored frosting, I was ready to fill the rest of the cake with pastel piped stars!


Hours later, I was done. (Yes, it took hours! I had to return the cake and frosting to the fridge several times to avoid melted frosting!)


But all the hours of piping stars was worth it - I loved the end result! So cute and pastel and perfect for a birthday party!


Monica later told me that when she asked her daughter what her favorite part of her birthday party was, she had answered, "the CAKE!". Hearing that made my heart swell. :)


Happy Birthday, Izzy! And Happy Birthday, Hello Kitty!

Monday, January 27, 2014

hello kitty pastel pom pom birthday cake and cupcakes


My sweet Melodie turned four this past December! Where does the time go?!?

Last year, she requested a purple Hello Kitty cake, which I made to for us to celebrate with at home, and then I made these Hello Kitty mini cupcakes for her party at preschool. But this year, she requested a "rainbow Hello Kitty cake", so I decided to make her a pastel rainbow pom pom cake!


For the cake layers, I made a white layer and a pink layer, and sliced each in half horizontally. Then I filled each layer with freshly whipped cream.


After a quick crumb coat with whipped cream, I let the cake set in the fridge for about 30 minutes.


In the meantime, I colored portions of the whipped cream with pastel colors - pink, lavender, mint green, and sky blue - all using Americolor gel paste food coloring. 


I also colored very small portions with black, red, and yellow for the eyes, bow, and nose. After quickly piping a Hello Kitty face on the top of the cake (see here and here for more examples on how I do this), I started piping the pom-poms around it, by piping stars with a Wilton #18 tip.


Then I filled the sides with piped stars as well, varying the colors randomly.


I loved the finished cake! And so did Melodie!


As for her class party, I made matching cupcakes! Pink on the inside, pastel pom-poms on the outside, with piped Hello Kitty faces on top. (see here, here, here, here, and here for more example of how I pipe mini Hello Kitty faces!)


Happy Birthday to my little Melodie!


Sunday, August 4, 2013

camouflage pom pom cake


For my husband Grant's birthday last year, I made him this camouflage petal birthday cake.  I had wanted to make him a "manly" cake, but I guess the term "petal cake" isn't so manly!  This year I decided to make him another camouflage cake, this time using a "pom pom" effect that I saw on here on Pinterest, which eventually led me to this I Am Baker cake!  Even though the term "pom pom" isn't exactly "manly" either, I had the idea in my head and I couldn't shake it.  So I bought a bunch of Wilton grass tips and I was on my way!


I started by baking a 6-inch vanilla cake, and 6-inch chocolate cake.  After they had cooled, I sliced them in half horizontally with a serrated knife.  Then I whipped up a big batch of fresh whipped cream.  I took a portion of the whipped cream and mixed it with chopped Oreo cookies, and used that to fill the cakes.


First I placed a layer of chocolate cake on my cake round, then piped a layer of the Oreo whipped cream and smoothed it out with an offset spatula.  Then came a layer of vanilla cake, followed by more Oreo whipped cream, then another layer of chocolate cake, more Oreo whipped cream, and then finally the last layer of vanilla cake.


After covering the cake in a quick crumb coat of the whipped cream, I divided the rest of the frosting into portions to be colored brown, black, green, and olive drab green.  As with last year's cake, I used cocoa powder to help color the brown and black frosting in order to minimize the amount of food coloring I was using.


Once the frosting was colored, I fitted my piping bags with my new grass tips and filled the bags with the different colors of frosting.  And then I started piping my pom poms!


As I was piping away, several of the pom poms came out looking like messy blobs.  It could have been because my frosting was getting too soft, or because the tips were getting clogged, or because I was using whipped cream for frosting!  But I only had a limited amount of time, with a three-month old newborn at home, and a husband and our other two kids who were about to come home to an unfinished cake!  So I kept piping away, trying to clear my piping tip and cool down my frosting in the fridge as often as I could.


Although the cake turned out messier than I would have liked, it still tasted delicious with it's cookies-n-cream goodness!


Happy birthday, my love!


Friday, May 11, 2012

banana cupcakes with cream cheese frosting and fruit leather flower pom poms


By the time I got to the sign-up sheet for the Teacher Appreciation Week luncheon at my son's preschool, there was nothing left to sign up for.  Literally nothing - all the slots were full.  But I wanted to make something to bring anyway, and since we had an abundance of overripe bananas at home, I decided to make banana cupcakes.


At first I was just going to top the cupcakes with a simple cream cheese frosting, but then a few days before the luncheon I saw this post at Best Friends for Frosting, which linked to this tutorial at Wedding Chicks - edible DIY flower pom poms made out of fruit leather!  Genius!


Making the pom poms was fairly simple.  The hardest part was getting the petals to stay put.  But the tutorial said to use toothpicks to help hold the petals in place while they dried, and that seemed to help.  But even though I let them dry overnight, they were still a bit soft and floppy the next morning.


The night before the luncheon, I made my banana cupcakes using my mom's banana bread recipe (stay tuned for a post on her banana bread later).  One batch of batter that would normally fill one 9-inch loaf pan ended up making 16 cupcakes.


I thought perhaps the cupcakes might come out more like muffins, since the recipe was meant for banana bread, but I sampled one after they were baked, and it was actually the perfect texture!


Next I whipped up a batch of cream cheese frosting and used a 1M tip to pipe large roses on top of the cupcakes.  And then I topped them with my pom poms.


I had only made 6 of the fruit leather pom poms (they were more time-consuming to make than I had anticipated!), so I topped the remaining cupcakes with sugar pearls and non-pareils.


I hope all the teachers enjoyed the cupcakes!  Happy Teacher Appreciation Week!