Saturday, April 21, 2012

hello kitty cake - pink ombre cake with whipped chocolate ganache and swiss meringue buttercream


It was my birthday this past week, and of course I had to make a cake for myself!  For my birthday last year, I made this coffee chiffon charlotte with homemade lady fingers, which was such a fun cake to make because: a) I had been wanting to try making a charlotte, and b) I had never made homemade lady fingers before.  But this year, I wanted to make a Hello Kitty cake - I'm sure you all know about my obsession with Hello Kitty by now!  So I made a cake covered with lots and lots of Hello Kitty!  Here is the sketch of what I had envisioned:


The idea actually came to me while I was piping roses onto this cake using I Am Baker's rose cake method - I had already made a few rose cakes before and suddenly thought to myself, I should cover a cake with Hello Kitty in the same way!  The only thing I couldn't decide was if I wanted the kitties to be staggered (like with the rose cakes), or in neat rows.  I decided to go with the neat rows.


I wanted the cake portion to be pink, so I made an ombre vanilla cake with varying shades of pink.


Once the cake was baked and cooled, I started on the filling.  I decided to do a decadent chocolate ganache, so I simply heated some heavy cream and then poured it over my dark chocolate, waited for the heat to melt it, and then stirred it up until the chocolate became smooth and glossy.  Once the ganache came to room temperature, I whipped it until it became fluffy and light, and then piped it in between my layers of pink cake.


As for the frosting, lately my go-to frosting has been a cream cheese cheese buttercream, but I have really been wanting to try making swiss meringue buttercream, which I tried out for the first time!


The frosting was definitely more complicated to make than a regular buttercream, because you have to heat egg whites and sugar to a certain temperature, and then whip them into a meringue.  Then you add butter a chunk at a time, until it comes together into a beautiful glossy buttercream.  But the extra effort was worth it, because it came out so silky and smooth, and wasn't too sweet at all.  I tasted the frosting right before I frosted the cake, and I was so excited because it tasted like whipped cream!  And it was so easy to work with because it was so light and fluffy and smooth.


So I did a quick crumb coat over the entire cake, and then a second coat as well.  


And then came the fun part - piping Hello Kitty!  I piped her the same way I do on my Hello Kitty cupcakes and mini cupcakes (my favorite thing to pipe on cupcakes), except this time I piped her on the sides of the cake.


First I piped the Hello Kitty heads all the way around the cake, so that they would be evenly distributed along the sides.  Next I piped the ears with a leaf tip.  At this point it didn't look like much, until I brought her to life by adding the eyes, whiskers, bow, and nose.


And the final Hello Kitty count - 56 of them!  And it was so much fun to do!


As for the top of the cake, my inspiration for the bow came from this Hello Kitty cake that I had made for my daughter (which I also later made again for a bridal shower).  My favorite part about the cake was the bow, so I decided to pipe that same bow onto this cake as well.


When the cake was finally done, I was seriously giddy.  It was my dream birthday cake.  A ton of Hello Kitty, her cute little bow on top, and served on top of my brand new Rosanna rococo noir cake stand!  Wheeeee!


Later on when we ate the cake, the frosting was still silky but didn't have the same 'whipped cream' taste.  Perhaps because it had hardened in the fridge, or because smoothing it on the cake made it more compact, but it had a much more buttery taste than when it was freshly whipped.


Also I missed that cream cheese 'tang' from my favorite cream cheese buttercream, so I've been eyeing this swiss meringue cream cheese frosting at 6 Bittersweets to try out next time!


I was so excited about this cake that I posted it on Instagram as well!


In the end, I just couldn't bear to eat the Hello Kittys.  So I saved them for my kids to eat - they had no problems digging right in!


*** Update:
You can now find my recipe for Pink Ombre Hello Kitty Cake in my new book, "The Hello Kitty Baking Book"! Enjoy!

Monday, April 16, 2012

pink owl birthday cake


My friend Diana has a daughter named Naomi who loves owls.  So when she asked me to make the cake for Naomi's 4th birthday party, I had to make an owl cake!  Luckily for me, her husband designed an owl logo specifically for the birthday party (he also designs all the cards at their own stationery business, bumble ink!), so I used his logo as inspiration for the cake!


A few weeks before the party, I started brainstorming and sketching.  I finally decided to just do a simple pink cake with the pink and white owl logo, a white shell border, and vertical piped pink sides (sides similar to the carnival birthday cake that I did a while back).


The birthday girl requested "a vanilla cake with strawberries", and so I set out to make a 12x17 vanilla cake, filled with strawberries and whipped cream.  I used my go-to vanilla cake recipe, which is moist and fluffy because it calls for whipped egg whites which are carefully folded into the batter.


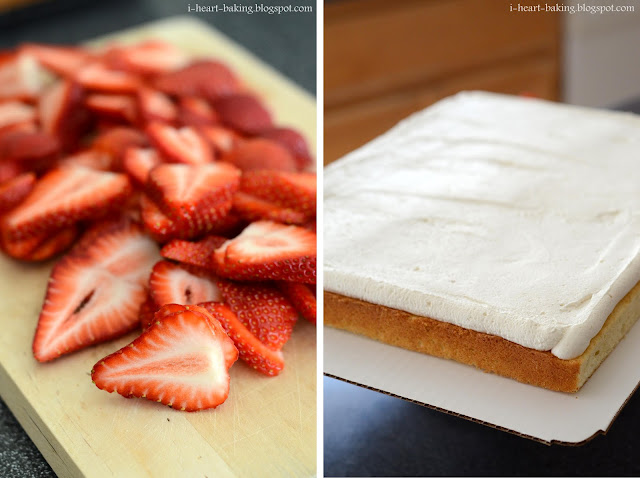
Once the cakes were baked, I started on the filling.  I sliced up my strawberries, and then whipped up 3 batches of freshly whipped cream.


Then I piped a border of whipped cream on the perimeter of the bottom layer of cake, and then filled it and smoothed it with an offset spatula.  Next came a layer of the sliced strawberries, arranged in neat rows.


After topping it with more whipped cream and then the second layer of cake, I whipped up 3 batches of cream cheese buttercream, and set a bit of it aside (since I would be neededing white frosting).  To the rest of the frosting, I added a combination of Americolor "fuschia" and "soft pink" to get the perfect color of pink. Then I did a quick crumb coat over the entire cake, and then a second smooth coating on the top.  And for the sides, I piped the vertical stripe pattern with a large basketweave tip.


Then I piped a shell border on the top and the bottom, and finally, the owl!


I also added a birthday message by piping with melted chocolate, but as I was piping I started to question my decision to use melted chocolate, because my piping tip kept getting clogged!  And the piping kept coming out in uneven spurts!  I was also annoyed with my letter spacing.  I tried to fix and doctor the birthday message as best as I could, but after a while I realized I needed to stop messing with it and just let it be, otherwise I was going to mess it up even more (sigh).


But in the end, all that worrying went away because Naomi loved her cake!  I've never seen her so excited!


She even spent a portion of the party perched on a chair in front of her cake, staring at it as if she was guarding it!  She was so adorable!


Hope you had a happy birthday, Naomi!  We love you!!!


Tuesday, April 10, 2012

hello kitty triple chocolate mousse cake studded with silver dragees


My best friend Sue and I both share a love for Hello Kitty, so I wanted to make her some sort of Hello Kitty cake for her birthday this year.  Last year I made her this cake inspired by Boston cream pie, and while I thought it looked pretty, it didn't live up to my expectations in the taste department.  So this year I wanted to make her something that tasted great, and since I know she loved my triple chocolate mousse cake, I decided to make her a Hello Kitty triple chocolate mousse cake!

I've made this triple chocolate mousse cake many times already, so I thought it would be a breeze to make in Hello Kitty form, but from the very first step my cake ran into complications!  My first mistake - for the bottom layer, I baked an 8-inch cake using my favorite homemade chocolate cake recipe.  I wanted to use the same technique I used for my Hello Kitty tiramisu cake, by cutting out and fitting the cake into a Hello Kitty shaped mold.  But after the cake was baked and cooled, I went to cut out my Hello Kitty shape, and realized that the cake was too small - I should have used my 9-inch cake pan!  Doh!


But it was late at night already and didn't have time to bake a whole new cake, so instead I just cut out the main part of Hello Kitty's face with the majority of the cake, and then with the scraps I cut out the shape of the ears and bow.  Then I fit them into the mold, hoping the mousse that would go on top would end up holding the cake in place.

Then came my second mistake - I made the chocolate mousse for the middle layer using the recipe from my copy of America's Test Kitchen "Complete TV Show Cookbook", but for some reason when it was time to fold in the whipped cream into my chocolate mixture, the chocolate seized up and turned the mousse into a lumpy chocolaty mess instead.  This had never happened to me before!  So I had to start all over with another batch of the chocolate mousse.


Right after that came my third mistake - after filling the mold with my layer of chocolate mousse, I picked up the cake so that I could put it in the fridge to set.  But instead of picking it up by the cake board on the bottom like I should have, I picked it up by holding on to the mold.  Before I knew it, the mold slid right off of the cake, and since the mousse was still soft and hadn't set yet, everything came oozing out over the sides of the bottom cake layer.  I screamed out loud and immediately fit the mold back on, but it was too late.  I knew at this point I would not have clean layers.

The top layer of white chocolate mousse didn't have any major mistakes surprisingly, except that my white chocolate mixture was a bit too warm when I folded in the freshly whipped cream, so the resulting mousse was a bit too runny.  But after it set in the fridge you couldn't tell, other than the fact that the layer wasn't as tall as it should have been.  At this point it was 2am so I went to bed, hoping that the string of mistakes would not follow me into the next day!


In the morning, I started my day by unmolding the cake, and then decorating the top of the cake.  I didn't want to simply use cocoa powder like I did for the tiramisu cake, so my husband came up with the awesome idea to use silver dragees instead.  He got the idea from a shirt that our daughter wears quite often, which is bedazzled with little studs to form the shape of Hello Kitty.


On a side note, I find it crazy that it is illegal to sell silver dragees in California!  Yet, you can buy them in every other state in the country.  Online stores that sell silver dragees won't even ship to you if you are in California.  Because of this, the only silver dragees that I have are the ones my husband bought for me while visiting his parents in Hawaii last year.


That said, it would probably be illegal to sell this cake in California!  Because it is decorated with lots and lots of silver dragees.


In the end, despite all of the blunders while making the cake, I still loved the end result.  Of course the layers didn't look as clean as I would have liked, but seeing Hello Kitty light up and sparkle through silver dragees brought a smile to my face.  


I hope that Sue liked it was well!  Happy Belated Birthday!


Thursday, April 5, 2012

easter egg layer jello


Last year for Easter I made these birds nest cupcakes.  And this year, when I saw this blog post at Just a Taste on how to make a jello egg inside of a real egg shell, I was enamored with the idea, and I wanted to make layered jello eggs for Easter!  I was already brainstorming in my head how I would do it, what I'd do with the leftover insides of the egg, what colors/flavors of jello I would use ... and then while I was at the grocery store later that week, I found this crazy gadget - it's specifically meant for making jello eggs!  Best of all, it was free with the purchase of 3 boxes of jello!  Score!


I practically skipped home with my new gadget, ready to make Easter jello.  I had signed up to make jello for my daughter's daycare Easter party anyway, so I would just use some of the mixture to make my layered jello eggs.  I decided that I wanted to make pastel layers in between the colors, instead of the white layers like I normally do.  So I made my usual layer jello recipe, but for the pastel layers, I used the colored jello and replaced 1/2 cup of the water with heavy cream.


The resulting pan jello for my daughter's daycare party turned out pretty, although it didn't exactly scream "Easter".  Also it wasn't very tall since I only did six layers (instead of the usual seven), plus some of the jello mixture was subtracted to be used in my experiment with the jello eggs.


As for the layered jello eggs, they did not turn out so pretty.  I must not have closed the two halves of the form all the way, because all of the eggs had an ugly seam all the way around the middle.  Plus because I was experimenting with the order of the colors, they all turned out looking rather odd.  But still cool because they're shaped like eggs!  Next time I'll try solid colors instead, or maybe I'll just stick to using the white layers of jello in between the colors.


Hope you have a Happy Easter!

Sunday, April 1, 2012

red velvet cake with cheesecake middle and piped roses


My husband Grant's parents came from Hawaii to visit us for two weeks in March, and during their stay we celebrated his mom's birthday.  I know that she loves red velvet cake, and she also loves cheesecake, so I decided to make her a red velvet cake filled with cheesecake!  I had never even heard of this cake until I read about it last year at 17 and baking (love her site!).  At the time, I thought it sounded like a very decadent dessert and wanted to try making it, but I never had a chance to, until now!

The night before making the cake, I baked the cheesecake layer.  I used a recipe from Dorie Greenspan's "Baking: From My Home to Yours" for basic tall cheesecake.  Since the recipe was for a 9-inch cheesecake, I divided everything by 1/4 since I was only making a 6-inch cake and I didn't want too tall of a cheesecake layer.


After baking the cheesecake in a water bath for 90 minutes, I propped open the oven door with a wooden spoon and allowed it continue to "luxuriate in it's warm bath" (as Dorie put it) for another hour.  Then I took it out and let it come to room temperature, before wrapping it up in saran wrap and putting it in the fridge overnight.


The next day, I baked the cake layers using my favorite red velvet recipe from Martha Stewart's "Cupcakes" book, except that I divided the recipe in half and poured the batter into two 6-inch pans instead of a cupcake pan.  Once they were baked and cooled, I started assembling my cake.


First I trimmed the tops off my red velvet cakes to make the surface even.  Then I placed the first cake layer right side up onto a 6-inch cake circle.  Next came the cheesecake - I unmolded it from the pan and placed it on top of the first cake layer.  Then I placed the second layer of cake upside down onto the cheesecake layer, so that I would have the smooth bottom of the cake to frost.


Next I whipped up a batch of cream cheese buttercream, and then spread a quick crumb coat of frosting onto the cake.


Then after a quick chill in the fridge, I used the rose cake method from I Am Baker to pipe my roses all over the cake.  (I've used her rose cake method a few times already, see here and here, and I still love the look every time).  I started by piping the top of the cake, then I piped the sides, and then I filled in any gaps with little swoops and swirls.


In hindsight, I probably should have spread a layer of frosting between the cake and cheesecake layer, as the cake started to shift a little when I cut into it, and the frosting layer would probably have held it in place.  Lesson learned.


Here's a final picture of my mother-in-law with the kids, who helped her to blow out the candles.  Happy Birthday!!!