Showing posts with label savory. Show all posts

Saturday, March 31, 2018

deviled eggs


I normally don't write about savory items on my blog (there are so few that you can see them all here), but since it's Easter I thought it would be the perfect time to share my favorite recipe for deviled eggs! They are the perfect easy snack or appetizer to make for any gathering, including Easter!


For the eggs, you can boil them or steam them like I like to do (in a rice cooker for 12 minutes, with the eggs propped up on a metal trivet!), but be sure to submerge them in an ice bath afterwards for easy peeling. Once all of the eggs are peeled, cut them in half and carefully pull out all of the yolks, and add them to a bowl with the rest of the filling ingredients. Then you can use a fork to smash the yolks with the rest of the ingredients. (I've also seen shows where they whisk the filling in a standing mixer for a smoother consistency!)


Once the filling is well mixed, I like to use a disposable pastry bag and a large star tip to pipe the filling into each egg white cavity, bur you could also just use a small spoon to drop the filling in.


Then top each egg with sliced gherkins (I also added homegrown cilantro instead of pimentos, but you could also do green onions or other herbs), and then sprinkle a bit of paprika over each one, and you're done! Super fast and easy, and the kids even helped me decorate them!


Happy Easter!


Sunday, January 21, 2018

chickie chinese diakon pastries (lo bo si bing) for chinese new year


Last year for Chinese New Year, we went to my mom's house, where we celebrated with a chinese feast, including my mom's homemade potstickers! (For those of you who have never had a potsticker, it's a dumpling filled with meat and veggies, that is both steamed and pan fried on the stove). For my contribution to the feast, I decided to make one of my favorite chinese pastries, lo bo si bing, which features a flakey pastry crust filled with seasoned daikon (asian turnip or radish). I've been making these for a few years now, but with a crust recipe that I made up, which is much simpler than the traditional complicated chinese pastry dough (which features an inner and outer dough!).

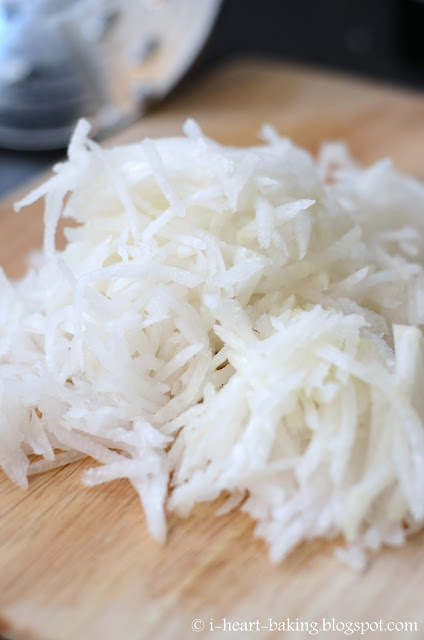
The daikon filling is very simple, it's just peeled shredded diakon (I like to shred it in the food processor with the grater attachment), which is sauteed with minced garlic, salt, white pepper, soy sauce, and chopped green onions. Then be sure to let it cool before filling your pastry.


For the pastry dough recipe, you're going to flip when I tell you what it is. It's basically my all-butter pie crust recipe, except you use vegetable oil instead of butter. Yes, I know it sounds weird. But it works! When my mother-in-law first told me about a similar crust that her friend made for a japanese ube (purple sweet potato) filled pastry, I didn't believe that the crust would come together. But I tried it, mainly because my best friend's daughter is allergic to dairy, and I thought one day I could make her an apple pie that she could actually eat! I didn't have a recipe, so I just tried out my own recipe. And I couldn't believe that it worked!

You basically add vegetable oil to your flour, sugar, and salt, and then the magic is to add ice cold water, which somehow causes the vegetable oil to seize up and turn the mixture into a crust-like consistency! Amazing, right? But the caveat is that you can't roll it out like regular pie crust. You have to kind of pat it into place with your hands. And sometimes it falls apart, but no worries because it's super easy to patch up.


So anyway, back to the diakon pastries :) After making my vegetable oil crust, I used a small ice cream scoop to portion out the dough. With each portion, I rolled it into my hand until it turned into a smooth ball, then flattened it out, and then filled it with my daikon filling before pinching it together and then setting it on my sheet pan with the seam side down.


I brushed the tops with a bit of egg wash, and then sprinkled on some black sesame seeds before baking them at 350F until they turned golden brown.


Aren't they pretty? And so delicious too, you wouldn't think the combination of sauteed diakon and pastry flakey would taste so good!


Since we were celebrating the year of the Rooster, I thought I'd make some of them in the shape of a chickie! So I decorated some of them with black sesame seed eyes, yellow heart beaks, and red heart combs.


I thought they turned out pretty cute!


Here are a few photos of our celebration with the kids, my mom, her sisters, and my cousin and her kids. (And of Miss Melodie helping us wrap homemade potstickers! She did a great job!)

Stay tuned to see what I make this year! Happy Chinese New Year!


Sunday, November 20, 2016

savory roasted onion tart (quiche)


Last November, I was invited to a Chantal Guillon macaron party hosted by my friend Anita from Dessert First. It was such a fun party! We got to drink champagne, eat macarons all night, and we were even invited into the kitchen to fill and decorate macarons as well! 


While I was there I met a few fellow food bloggers, which led to following a few new people on Instagram as well, including Brenda from Bites and Bourbon. Fast forward several months, and I happened to see a beautiful roasted onion tart on Brenda's Instagram feed, which I instantly knew that I HAD to make!


In her post, Brenda mentioned that the recipe was from Edible Cleveland, so I looked it up and found it here! It starts with pie crust, fitted into a 9-inch pie pan and then blind baked at 375F for 20-25 minutes.

For the onions, I chose a yellow onion as well as a purple one, so that the color would stand out and make the tart pretty. The onions are first roasted before being added to the tart, to give it a nice caramelized onion flavor. After being drizzled with olive oil and sprinkled with salt and pepper, they were roasted on the top rack of the oven while the pie crust baked on the bottom rack.


In the meantime, I made the filling, which was so simple! Eggs, thyme, milk, and salt. And cheese of course!


Once the pie crust was baked and cooled slighly, I added the filling...


... and carefully decorated the top with the beautiful roasted onion slices. Who knew onion slices could make such a pretty pattern!


Then the whole thing went back in the oven for 45-50 minutes until the filling set.


Mmmmmmm ....


I must say, this tart was delicious!!! It would be perfect for breakfast/brunch, lunch, or even dinner (which is when we ate it!). Or even just as a snack. :)


 Thanks for introducing me to this recipe, Brenda!


Wednesday, June 4, 2014

mother's day brunch - canadian bacon strata, garlic lemon asparagus, fresh pea soup, and mimosas


To go along with the heart surprise-inside Mother's Day cake that I made this year, my husband and I also cooked up a lovely brunch for my Mom. The night before the brunch, I assembled my Canadian bacon strata (it's basically like a savory bread pudding). I have made this strata many, many times, and I love it each time. I usually make it when we have house guests, because this is the perfect morning breakfast dish that you can prepare the night before, and then pop in the oven first thing in the morning. That way, you can catch up with your house guests over coffee while it bakes, and you won't have to be busy in the kitchen cooking up breakfast!

I saw this recipe on the Everyday Food cooking show several years ago, and have been using the same recipe ever since. First halve and toast your English muffins (I like to do this all at once on a sheet pan in the oven, but you could also use your toaster if you prefer).


Once toasted, slice each English muffin in half to create a half circle. Then get your Canadian bacon and slice those into half circles as well, and then alternate English muffins and Canadian bacon when layering them into your buttered baking dish.


Next, assemble your custard mixture (milk, eggs, mustard, hot sauce, and seasonings) and pour it all over the English muffins and Canadian bacon.


Finally top it with grated cheddar cheese and a little bit of grated parmasan.


And that's it! So simple! Cover it with plastic wrap and let it set in the refrigerator overnight (or you could just let it set for 2 hours if you are making it the day-of). Then first thing in the morning, remove the plastic wrap and bake it at 350F for a little over an hour (the recipe says one hour and 30 minutes, but I usually don't need to bake it that long).


For our Mother's Day brunch, I set a nice and simple table, with champagne glasses for Mimosas. :)


For the Mimosas I just combined equal parts orange juice with champagne, but you can also add Triple Sec if you like.


To go with the strata, I also made a simple fresh pea soup adapted on this recipe from Sunset Magazine, with a sprig of fresh parsley and drizzled with good olive oil. (I excluded the almonds since my daughter is allergic to all nuts, used parsley instead of mint, and also added a bit of sour cream for richness).


Finally, my husband whipped up my favorite Mario Batali asparagus to go with the brunch. Lightly blanched and then tossed with lemon zest, garlic, and olive oil, this asparagus dish is so fresh and tasty, even the kids like them!


Hope you had a happy Mother's Day, Mom!