Showing posts with label cookie cutter kingdom. Show all posts

Sunday, May 14, 2017

unicorn cookies


To go along with the unicorn cake in my last post, I also made unicorn cookies as favors for Melodie's 7th birthday! I had received this awesome unicorn cookie cutter from Cookie Cutter Kingdom a while back, and now was the perfect time to use it! (Thanks Cookie Cutter Kingdom!)

As always I made my favorite sugar cookie dough (recipe in my book, The Hello Kitty Baking Book!), rolled it out to 1/8 inch thick, cut out my shapes, and baked them at 350F until golden brown (about 10-12 minutes).


To decorate, I whipped up a batch of royal icing (recipe also in my book!) and used stiff white icing to pipe at outline around each cookie (using a disposable pastry bag fitted with a small round tip).


Then I filled them in with runny white icing and let them dry for several hours.


For the horn I used medium (in between runny and stiff) golden yellow icing, and a mix of Wilton violet and Americolor violet to color the medium icing for the mane and tail (the violet by Americolor was a little more on the blue side, so I had to mix in violet by Wilton to make it more purply).


I thought they were pretty cute, but needed something to jazz them up! So I used a little bit of royal icing to "glue" on a few edible gold stars onto each unicorn.


They added just the right amount of sparkle!


Hope you enjoyed your cookies, Miss Melodie! Happy birthday!


Sunday, October 2, 2016

fall leaf cutout apple pie


It's become tradition that I make apple pie for Thanksgiving (and Christmas!), so last year for Thanksgiving I decided to decorate my apple pie with leaf-shaped pie crust cutouts! I used this awesome leaf cookie cutter from Cookie Cutter Kingdom, and it worked out perfectly! (Note: I also used the same cutter to make these leaf cookies decorated with royal icing!)


After making my favorite all-butter pie crust (recipe in my book, The Hello Kitty Baking Book!), I divided the dough in half and shaped each into a disc, then wrapped them in plastic wrap and let them rest in the fridge for 30 minutes. Then I rolled them out to about 1/8" thick, and fit the first half into the bottom of my pie dish.


With the second half, I used the leaf cookie cutter to cut out my leaf shapes.


Then I placed the prepped pie dish and leaf cutouts in the fridge while I made the filling.


After peeling, cutting, and mixing my fresh apple filling (recipe also in my book!), I poured it into my chilled pie dish.


Next I used the leaf cutouts to decorate the top of my pie. I like to arrange them in a shingled pattern, but you could just throw them on randomly as well.


The leaf cutouts served two purposes, a) to add a pretty decorative touch to the pie, and b) the spaces between the cutouts serve as vents to let the steam out of the pie, this way you don't get a soggy pie!


After placing my final two cutouts in the center of the pie, it was almost ready to bake!


But before I put the pie in the oven, I applied a light coating of egg wash and sprinkled on some sanding sugar to give it some shine.


I baked it at 425F for 15 minutes to get the beginnings of a golden crust, and then turned the heat down to 350F and baked it for another 40-45 minutes.


And there you go, a beautiful fall leaf cutout apple pie - perfect for Thanksgiving or any other fall gathering or event! Enjoy!


Sunday, August 28, 2016

umbrella cookies


I'm back! We were away for summer break, visiting hubby's family in Hawaii - and now that we're back, it's back to reality! School for the kids, work for the adults, and of course, baking for me!

In addition to the diamond engagement ring cookies that I made for Diane in my last post, I also made umbrella cookies, in pink and sage green to match the bridal shower colors.

I searched online everywhere but couldn't find an umbrella cookie cutter that I liked, so I used Cookie Cutter Kingdom's custom cutter tool to design my own! All I had to do was draw the umbrella shape that I wanted, upload it, and voila, the perfect umbrella cookie cutter!


After the cookies were baked and cooled, I whipped up a batch of royal icing (cookie and icing recipe in my book, The Hello Kitty Baking Book), and got to work on mixing my sage green color. I ended up using two parts leaf green gel-based food coloring, with one part brown, to get the perfect color green. Then I used the green stiff icing to outline each umbrella, and then watered it down to get runny icing for filling them in.


After I let the icing dry for several hours, the final touch was using stiff white icing to pipe the umbrella details!


I also did the same for the peachy/pink umbrellas, except I used two 2 parts soft pink with 1 part orange to get the perfect shade.


Happy Bridal Shower!


Sunday, July 24, 2016

diamond engagement ring cookies


A few months ago, my instagram friend Rachel asked me to make cookies for her family friend Diane. Diane was hosting a bridal shower and she wanted engagement ring cookies, which sounded like so much fun to make, so I said yes right away!
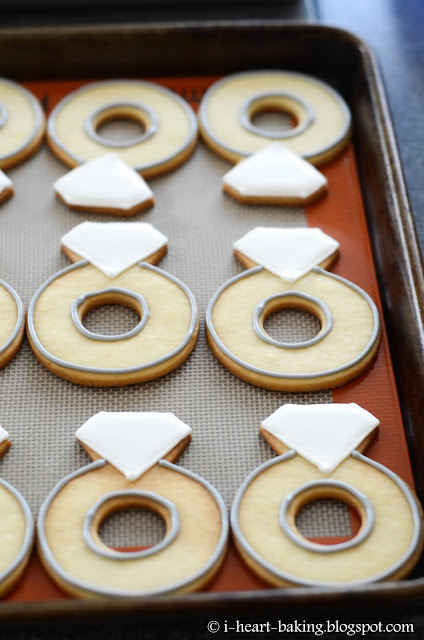
For the ring cookie cutter, my friends at Cookie Cutter Kingdom sent me a special cutter! They normally only make the ring cutter in 3" or 4" sizes, but I asked for 3.5" and they were so nice that they obliged and made me a special one! Thanks guys!
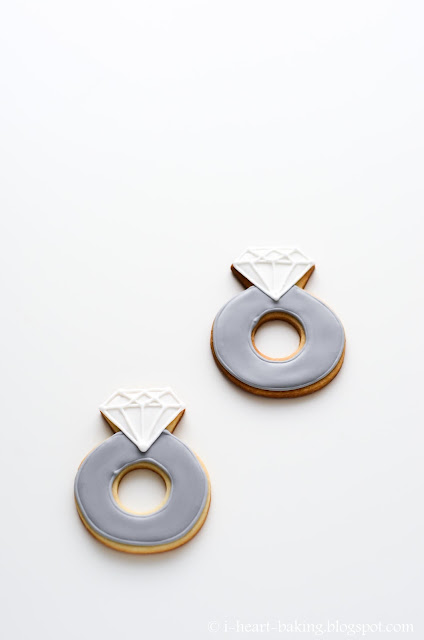

Armed with my new cookie cutter, I baked up my favorite sugar cookie recipe (recipe in my book, The Hello Kitty Baking Book!), rolled the dough to about 1/8" thick, and cut out my cookies. (For the hole in the middle, I used the backside of a piping tip!). Then I baked them at 350F for 10-12 minutes until they were golden brown.


Once all the cookies were baked and cooled, I whipped up a batch of royal icing (recipe also in my book!) and used stiff icing to outline the diamond part of the engagement ring. Then I filled it in with runny icing.


For the band part of the ring, I did the same thing with gray icing (outline with stiff icing, and fill with runny icing).


Then once the icing was dry (I like to let it dry overnight), I used more stiff white icing to pipe the details onto the diamond.


I thought they turned out pretty cute!


Happy Bridal Shower!!!


Sunday, January 24, 2016

rudolph the reindeer cookies


For my daughter's class Christmas party last month, I decided to make these cute reindeer cookies, based on a design I had seen at Bubble and Sweet. I loved the color of the turquoise and white reindeer with the red nose accent, but I decided to do the reverse and have a snowy white reindeer with turquoise spots and red nose instead. Luckily, I had recently been given a beautiful reindeer cookie cutter from Cookie Cutter Kingdom, so I was all set! (Thanks Cookie Cutter Kingdom!)


I started with my favorite sugar cookie dough (recipe in my book, The Hello Kitty Baking Book), which I rolled out to 1/8 inch thick, cut out shapes, and then baked at 350F for 10-12 minutes until the edges of the cookies had turned golden.


Then I whipped up a batch of my favorite royal icing (recipe also in my book!), used white stiff icing to outline my reindeer cookies, and then used white runny icing to fill them in. (The stiff icing outline acts as a border, so that the runny icing doesn't drip off the edges of your cookie!) For the turquoise spots on the reindeer's back, I mixed a bit of royal blue gel-based food coloring into stiff icing, and piped little dots onto the reindeers while the white icing was still wet. Then I let the cookie dry for several hours (or overnight).


Once the icing was dry, I piped little Rudolph noses with stiff red icing and a small round tip.


I just love the color combination of white, turquoise, and red!


Also, since we were hosting Christmas this year, I had an idea to have a little reindeer cookie on each place setting. So I left several cookies completely white with a red nose, and then painted the antlers gold inspired by these gilded reindeer cookies from Sweetapolita! To make the gold "paint", I used edible gold dust mixed with clear vanilla extract, similar to how I painted the gold star cookie that topped my Christmas tree cookie tower in my previous post. 


And here's how they looked on each place setting.


The little gilded reindeers went perfectly with my bay leaf garland, white candles, and gold flatware!


Hope you and your family had a very Merry Christmas!