Showing posts with label cutout. Show all posts

Sunday, October 2, 2016

fall leaf cutout apple pie


It's become tradition that I make apple pie for Thanksgiving (and Christmas!), so last year for Thanksgiving I decided to decorate my apple pie with leaf-shaped pie crust cutouts! I used this awesome leaf cookie cutter from Cookie Cutter Kingdom, and it worked out perfectly! (Note: I also used the same cutter to make these leaf cookies decorated with royal icing!)


After making my favorite all-butter pie crust (recipe in my book, The Hello Kitty Baking Book!), I divided the dough in half and shaped each into a disc, then wrapped them in plastic wrap and let them rest in the fridge for 30 minutes. Then I rolled them out to about 1/8" thick, and fit the first half into the bottom of my pie dish.


With the second half, I used the leaf cookie cutter to cut out my leaf shapes.


Then I placed the prepped pie dish and leaf cutouts in the fridge while I made the filling.


After peeling, cutting, and mixing my fresh apple filling (recipe also in my book!), I poured it into my chilled pie dish.


Next I used the leaf cutouts to decorate the top of my pie. I like to arrange them in a shingled pattern, but you could just throw them on randomly as well.


The leaf cutouts served two purposes, a) to add a pretty decorative touch to the pie, and b) the spaces between the cutouts serve as vents to let the steam out of the pie, this way you don't get a soggy pie!


After placing my final two cutouts in the center of the pie, it was almost ready to bake!


But before I put the pie in the oven, I applied a light coating of egg wash and sprinkled on some sanding sugar to give it some shine.


I baked it at 425F for 15 minutes to get the beginnings of a golden crust, and then turned the heat down to 350F and baked it for another 40-45 minutes.


And there you go, a beautiful fall leaf cutout apple pie - perfect for Thanksgiving or any other fall gathering or event! Enjoy!


Sunday, February 7, 2016

snowflake cutout apple pie for christmas


In addition to the cookie christmas tree and reindeer cookies that I made this past Christmas, I also made this apple pie for dessert! It's been a recent tradition of mine to make apple pie for Christmas, including this Christmas wreath apple pie, or this Christmas Tree apple pie (there's even a Hello Kitty apple pie in my book, The Hello Kitty Baking Book!), so this year I decided to do snowflake cutouts for my pie!


I started with a batch of my favorite pie crust (recipe in my book!), divided it in half, and rolled out my bottom crust to fit into the bottom of my 9-inch pie dish. Then I poured in my apple filling (apples, sugar, flour, cinnamon, cloves, salt, and a pinch of salt), and then used a snowflake cookie cutter to make a snowflake decorated top crust!


After a quick egg wash and a sprinkling with sanding sugar, I popped it into a 415F oven for 15 minutes, and then lowered it to 350F for 45-50 minutes, until the crust had become golden brown.


I'm already thinking of more shapes to make for future Christmases to come! 

Enjoy!

Tuesday, January 13, 2015

christmas wreath shingled apple pie


One of my favorite Christmas decorations is a beautiful Christmas wreath. Just the sight of wreaths hanging on all the doors in the neighborhood gives such a warm and welcoming feeling. In the past I've made Christmas wreath cupcakes, Christmas wreath mousse cake, and Christmas wreath cookies, so why not make a Christmas wreath apple pie?


Last year I made this Christmas tree apple pie, so this time I did the same thing except with little circle pie crust cutouts instead of Christmas tree shapes. It starts with a homemade all-butter pie crust, filled with sliced apples that are tossed with sugar, flour, cinnamon, ground cloves, and a pinch of salt. (You can actually find the entire pie recipe in my new book, The Hello Kitty Baking book - just look for the page on making Hello Kitty Apple Pie!)


With half of my pie crust dough, I rolled it out and fitted it into the bottom of my pie pan. Then I filled it with my spiced apple filling, before rolling out the second half of my pie crust and cutting out little scalloped circle shapes with a small cookie cutter. Then I neatly arranged a row of circle cutouts along the perimeter of my pie...


... followed by a second row of cutouts...


... and finally a third row to complete my wreath. Be sure to leave a little hole in the middle of the wreath to let the steam escape from the pie!


I baked the pie at 425F for 15 minutes, then lowered the heat to 350F for another 45-50 minutes (and by then the entire house smelled like delicious apple pie!)


The pie turned out perfect - the crust was tender yet flakey and crispy, and the apples were perfectly cooked with just the right amount of sugar and spice!


While the pie didn't resemble a Christmas wreath as much as I had hoped it would, I thought it was still super cute, and could actually be made for any occasion. I'll definitely be making this again, maybe next time I'll just called it "scalloped apple pie"! :)


Sunday, November 16, 2014

hello kitty pumpkin pie


I can't believe that Thanksgiving is only a week and a half away! What better time than to make this adorable Hello Kitty pumpkin pie? While I've made this pie several times (and even have made it into little mini pumpkin tartlets, like these Hello Kitty strawberry rhubarb ones), somehow this is the first time I'm sharing it! You can also find it in my new book, The Hello Kitty Baking Book!

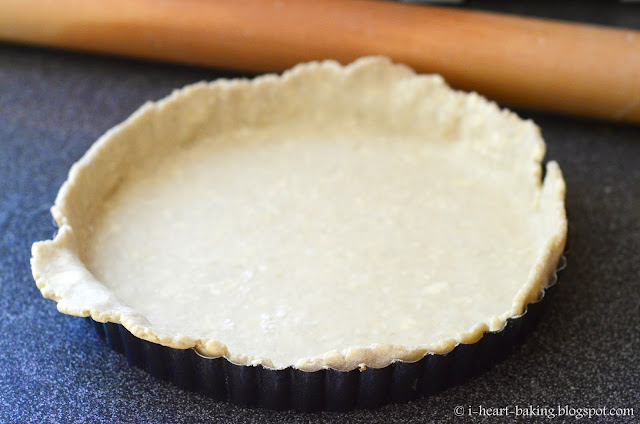
I start with a delicious, buttery, flaky crust, tucked into a 9-inch tart pan.


After using a rolling pin to cut off off the excess crust, I made a quick pumpkin pie filling, with just the right amount of spice, and baked the pie until just done in the center.


To decorate, I rolled out the excess pie dough scraps and cut out little Hello Kitty shapes with a cookie cutter, then baked them until golden.


Then place them on top of your baked pumpkin pie, and you have yourself one adorable pie! You can find this recipe and all new photos in my new book, The Hello Kitty Baking Book!


Enjoy, and Happy Thanksgiving!

Saturday, August 16, 2014

father's day peach pie


For Father's Day this year, I decided to make a pie instead of a cake, since we had just finished a whole slew of cakes recently (my birthday cake, Mother's Day cake, Grant's birthday cake ...). Since we had fresh peaches in the fridge, and a few baby nectarines on our tree in the backyard, I decided to make peach pie, with pie crust cutouts on top to spell out D-A-D! (If you remember, I had wanted to spell out M-O-M in my Mother's Day cake, but that didn't quite work out).


I sliced up my peaches and nectarines, and tossed them with sugar, flour, and a pinch of salt. Then I made my favorite all-butter pie crust recipe, formed it into two round discs, and let them set in the fridge for about half an hour. Once chilled, I took out once disc and rolled it out big enough to fit my pie plate, gently eased my pie crust into my pie plate, and then crimped the sides.


Then I poured in my peach filling mixture. (The little teeny pieces of fruit are the baby nectarines from our tree!)


Then I baked it in a 425F oven for about 15 minutes to get the crust going, and then reduced it to 350F to bake for another 45 minutes or so.

Once the pie was done, I took out my second disc of pie crust dough from the fridge, rolled it out, and used alphabet cookie cutters to cut out pieces to spell D-A-D. (I only used less than half of the second disc of dough). Then I sprinkled on some sanding sugar and baked them on a cookie sheet at 375F for 10-15 minutes.


Once the cutouts were done, I placed them on top of the finished pie. (Note: you could also place the pie crust letters on top of the unbaked pie, and then bake the entire thing together, but I find that the cutouts don't retain their shape as well).


Mmmmm, pie...


Hope you all had a Happy Father's Day!


Monday, January 6, 2014

christmas tree cutout apple pie


Along with the strawberry Santas that I made for Christmas dessert this year, I also made an apple pie. But not just any apple pie; this one was decorated with lots and lots of Christmas tree pie crust cut outs! I had seen pies like this on Pinterest in the past, mainly with star cut outs for the Fourth of July. So I thought it would be fun to do for Christmas as well.


So I made my favorite all-butter pie crust, and divided it in half. I rolled out and fitted the first half into a 9-inch pie pan, and used the other half to roll and cut out Christmas tree shapes with a cookie cutter.


Then I peeled, cored, and sliced 5 apples, tossed them with flour, sugar, cinnamon, cloves, and salt, and spooned them on top of the bottom crust. And then it was time to decorate the top with the Christmas tree cut outs!


To help give the crust a nice golden color, I brushed the top of the crust with egg wash, and then sprinkled on sanding sugar. After baking the pie at 350F for about 50 minutes, it looked like this!


My pie crust and the cutouts shrank quite a bit, but it was still quite tasty!


Hope you had a Merry Christmas!

Thursday, December 5, 2013

thanksgiving pumpkin pie with hand-turkey cutout


Remember those Thanksgiving art projects you used to make in school, where you cut out the shape of your hand onto construction paper, or made a hand print with paint, and then turned it into a turkey? Something like this?


Well that was my inspiration for this pumpkin pie! (The hand print above was made by my 9-month old son at daycare!) I actually saw this somewhere on Pinterest, and just couldn't get the idea out of my head! So this pie was among the desserts that I made for this year's Thanksgiving dinner.

I started out by making my favorite all-butter pie crust, and fitted it into a 10-inch pie pan. I trimmed the excess dough from the edges of the pan, and crimped the edges with my fingers. Then I filled it with a simple pumpkin filling spiced with cinnamon, cloves, and ginger, and baked it until the crust was golden and the filling was set. Sadly, the crust shrank while baking in the oven, thus the slightly embarrassing edges!


With the trimmings of pie dough, I rolled it out and used a toothpick to mark the shape of my almost-four year old daughter's little hand, and then (without her hand there) I used a paring knife to cut out the shape.


I made sure to include the turkey's beak, eye, and feet!


Then I baked it on a cookie sheet at 375F for about 10 minutes until it turned golden brown.


Again, the crust cutout shrank (maybe I'm over-rolling my pie dough?) so I ended up with a teeny tiny hand turkey! But that's okay, a miniature turkey is just as cute!


Happy belated Thanksgiving!