Sunday, September 4, 2016

hello kitty floral wreath cake


Every year for my birthday, I make myself a Hello Kitty cake of some shape or form. And this past year was no exception! At the time (this was back in April), I was so inspired by I Am Baker's wreath cake, that I knew I wanted to make it, but with little piped Hello Kitty's added to the mix!

I was in a strawberries and cream mood, but I wanted it to be really light, so I made a chiffon cake instead of my regular vanilla cake. Since I've found chiffon cake to be tricky to slice, I divided the batter into three 8-inch round pans to give me three layers of cake (instead of baking up one big cake and then slicing it into three layers).


Once the cake was baked and cooled, I filled each layer with freshly whipped cream and sliced strawberries.


With a bit more whipped cream on top of the strawberries, to seal them in.


After the last cake layer was stacked, I covered the top and sides of the cake with more freshly whipped cream, and smoothed it with an offset spatula.


As I Am Baker mentions in her wreath cake tutorial, you can pipe a ring of frosting on top of the cake to give the wreath a bit of a "lift" above the rest of the top of the cake. So I dutifully followed her instructions!


Then I began to pipe my "flowers", using colored buttercream and various sizes of open star tips. (Note that I whipped up a separate batch of buttercream, just for the flowers!)


I added more and more piping in other colors using other star tips...


... until I was happy with my wreath.


I could have left it just like this, because it was already so cute! But, I needed me some Hello Kitty!!!


So I piped my Hello Kitty faces with whipped cream, using a large round tip for the face, and a leaf tip for the ears. (See more on how I pipe my Hello Kitty faces! There is also a quick tutorial in my book!)


I used a small round tip to pipe black eyes and whiskers, and a little yellow nose. And for the final touch, I added heart confetti sprinkles to form the bow.


Wheeeee!!! Happy Birthday to me!!! :)


Sunday, August 28, 2016

umbrella cookies


I'm back! We were away for summer break, visiting hubby's family in Hawaii - and now that we're back, it's back to reality! School for the kids, work for the adults, and of course, baking for me!

In addition to the diamond engagement ring cookies that I made for Diane in my last post, I also made umbrella cookies, in pink and sage green to match the bridal shower colors.

I searched online everywhere but couldn't find an umbrella cookie cutter that I liked, so I used Cookie Cutter Kingdom's custom cutter tool to design my own! All I had to do was draw the umbrella shape that I wanted, upload it, and voila, the perfect umbrella cookie cutter!


After the cookies were baked and cooled, I whipped up a batch of royal icing (cookie and icing recipe in my book, The Hello Kitty Baking Book), and got to work on mixing my sage green color. I ended up using two parts leaf green gel-based food coloring, with one part brown, to get the perfect color green. Then I used the green stiff icing to outline each umbrella, and then watered it down to get runny icing for filling them in.


After I let the icing dry for several hours, the final touch was using stiff white icing to pipe the umbrella details!


I also did the same for the peachy/pink umbrellas, except I used two 2 parts soft pink with 1 part orange to get the perfect shade.


Happy Bridal Shower!


Sunday, July 24, 2016

diamond engagement ring cookies


A few months ago, my instagram friend Rachel asked me to make cookies for her family friend Diane. Diane was hosting a bridal shower and she wanted engagement ring cookies, which sounded like so much fun to make, so I said yes right away!

For the ring cookie cutter, my friends at Cookie Cutter Kingdom sent me a special cutter! They normally only make the ring cutter in 3" or 4" sizes, but I asked for 3.5" and they were so nice that they obliged and made me a special one! Thanks guys!


Armed with my new cookie cutter, I baked up my favorite sugar cookie recipe (recipe in my book, The Hello Kitty Baking Book!), rolled the dough to about 1/8" thick, and cut out my cookies. (For the hole in the middle, I used the backside of a piping tip!). Then I baked them at 350F for 10-12 minutes until they were golden brown.


Once all the cookies were baked and cooled, I whipped up a batch of royal icing (recipe also in my book!) and used stiff icing to outline the diamond part of the engagement ring. Then I filled it in with runny icing.


For the band part of the ring, I did the same thing with gray icing (outline with stiff icing, and fill with runny icing).


Then once the icing was dry (I like to let it dry overnight), I used more stiff white icing to pipe the details onto the diamond.


I thought they turned out pretty cute!


Happy Bridal Shower!!!


Sunday, July 17, 2016

yellow roses birthday cake


My friend Renee recently asked me to make a rose cake for her mom's birthday, and the reason behind it was such a sweet one. Apparently every year, her father would buy yellow roses for her mom on her birthday. Her father passed away not too long ago, and Renee wanted to continue the yellow roses tradition, but in a new way. So she asked me to make a yellow roses cake. (Doesn't that just bring tears to your eyes?!)


We decided on a vanilla cake filled with fresh whipped cream and strawberries, so I made two 8-inch vanilla cakes and sliced each in half horizontally, giving me four cake layers. Then I filled each layer with freshly whipped cream, sliced fresh strawberries, and more whipped cream on top of the strawberries.


I did this with each cake layer, giving me three layers of filling ...


and four layers of cake.


Then I did a quick coat of yellow buttercream, all over the tops and sides of the cake. (No need for it to be perfectly smooth here, as it will be covered with piped roses).


To pipe the roses all over the cake, which I've done many times in various colors and flavors (based on the original creation by I Am Baker, love her!), I used a Wilton 1M large star piping tip to pipe quick swirls to form the roses, repeating it all the way around the sides of the cake ...


and continuing the roses on the top of the cake as well.


I loved the result. It looked like a big bouquet of vibrant yellow roses!


Happy Birthday to your mom, Renee. I hope she enjoyed her yellow roses this year. :) 


Sunday, July 10, 2016

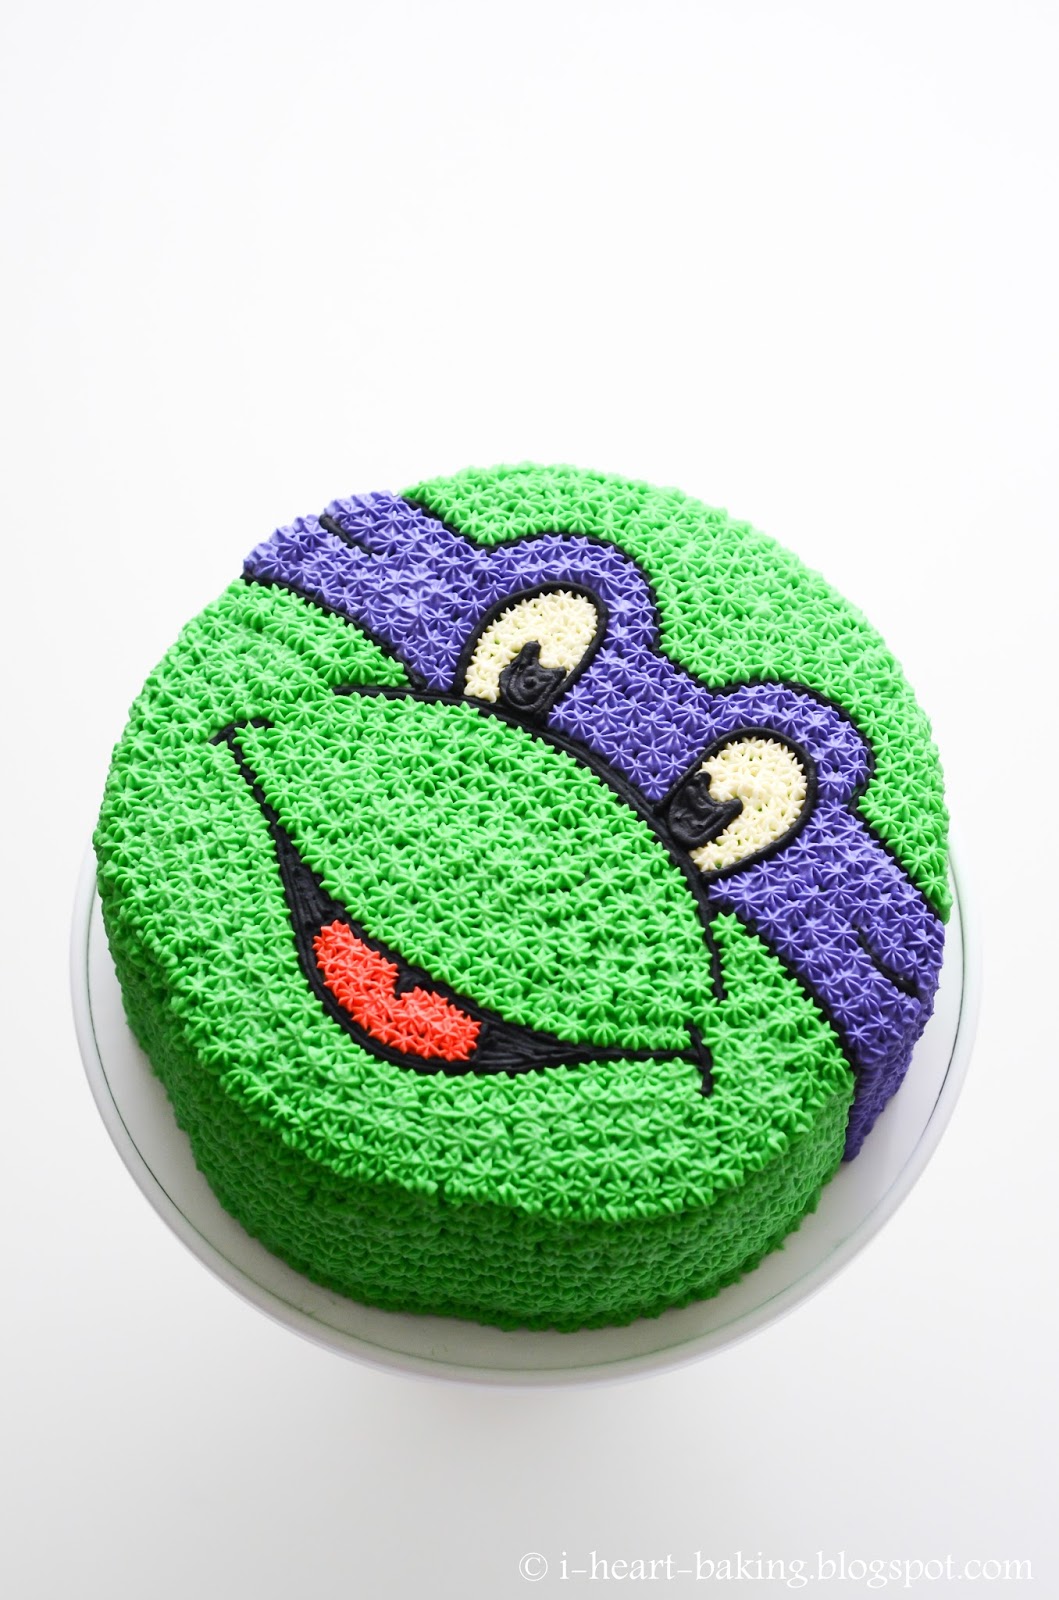
teenage mutant ninja turtle cake


While writing my book a couple of years ago, I was recipe testing for a Keroppi shaped cake, which I ended up bringing to a get-together at my cousin Yvonne's house. It was a chocolate cake filled with peppermint whipped cream, and since there was a lot of cake left she took some to work to share with her coworker. Fast forward a couple of years, and that same coworker asked me to make a Teenage Mutant Ninja Turtle cake for her son's birthday! We decided that I would make the same cake, but this time in the shape of a Ninja Turtle, and filled with freshly whipped cream and fresh strawberries instead of the peppermint whipped cream.

I started by baking up two 9-inch chocolate cake layers, and used a cardstock cutout to trace and cut my Ninja Turtle shaped cake. Then I cut each one in half horizontally to create four layers, and topped each layer with a layer of freshly whipped cream ...


... as well as a layer of sliced strawberries, and another layer of whipped cream on top of that.


I repeated this process until all of the cake layers were stacked and filled.


Next I whipped up 2 batches of cream cheese buttercream. I set aside a bit of it to be used and colored later, and then tinted the majority of it leaf green, covered the top and sides of the cake with it, and smoothed it out with an offset spatula.


For the details on the face, I used a toothpick to outline the eyes, nose, bandana, and mouth, and then used black frosting with a #3 tip to pipe over the outlines and fill in the mouth and eyeballs.


Next I used a medium star tip with the green frosting to fill in the face and the sides of the cake.


Finally I used the same star tip to fill in the rest of the face - purple for the bandana, red for the tongue, and white for the whites of the eyes.


I thought he turned out pretty cute!


You can find the recipe and instructions in my book, The Hello Kitty Baking Book!