Sunday, October 1, 2017

fantastic four birthday cake


I've had the privilege of making birthday cakes for Marni (my good friend Helen's daughter) every year since she was born! This year Marni turned four, and she was having a four-way joint party with her classmates from preschool, so the theme was Fantastic Four of course! Helen and I brainstormed on ideas for the cake, and eventually we decided that it would be a strawberries and cream cake with the Fantastic Four logo on the top, and each of the girls' names pipes on the sides.

For the cake, I used my favorite vanilla cake recipe (in my book, The Hello Kitty Baking Book!) to bake up two 8-inch round cakes, which I then cut in half horizontally to give me four cake layers. Then I filled each layer with freshly whipped cream and sliced strawberries.


Once my cake was filled, I whipped up two batches of cream cheese buttercream and covered the top and sides of the cake with it, smoothing it out with an offset spatula.


Next I used a toothpick to trace the outline of the Fantastic Four logo, and filled in the white portion with a medium star tip. I also traced out the names of each girl along the sides of the cake, and used a small round tip to pipe their names.


To finish decorating the cake, I tinted the remainder of the frosting with royal blue food coloring, and used a medium star tip to fill in the rest of the Fantastic Four logo, as well as the sides of the cake.


And then it was done!


The girls' names along the sides of the cake - Sabrina, Lauren, Emma, and Marni.


Hopefully all of the girls liked it!


Here's a shot of Marni with her birthday cake(s)!


And one of all the birthday girls!


My kids enjoyed themselves as well!


Happy Birthday Marni!

Sunday, September 24, 2017

purple and white flower bouquet cupcakes


Since I have three kids in two different schools (my youngest is still in preschool), I had two sets of cupcakes (on two different days) to make for Teacher Appreciation Day last year. Since everyone seemed to like the flower bouquet cupcakes that I made for the elementary school so much, I decided to do the same for the preschool, except with a different flavor cupcake and a different color frosting. So I decided on carrot cake cupcakes with purple and white frosting!


Once my cupcakes were baked and cooled, I was ready to start decorating!


As I discussed in my last post, the piped flowers were made using these Russian piping tips, and during my first time using them I learned two important things:

1. Your frosting needs to be at the right temperature. Too warm and your flowers will look like shapeless blobs. Too cold and the frosting won't squeeze through the holes in the tips.

2. Use a very large piping bag. I normally use 12-inch piping bags, but I would suggest using a larger one so that you won't have to refill the bag and the coloring on your flowers will come out more consistent.


But once your follow those two points, the flowers were pretty easy to pipe, and they come out pretty darn cute!


Again, I used green frosting and a leaf tip to pipe leaves in the gaps between the flowers, and the pop of green makes each flower stand out.


Enjoy!


Sunday, September 17, 2017

pink and white flower bouquet cupcakes


Last year for Teacher Appreciation Day, I signed up to make dessert for the teacher luncheon, and ended up making these flower bouquet cupcakes for the elementary school! I've made floral themed cupcakes for Teacher Appreciation Day before (see here and here), but this time I decided to test out my new set of Russian piping tips. 

Let me just say that the tutorials I saw on these tips made them look so easy, but I actually had a hard time with them! For my first attempt, I popped the piping tip into my pastry bag, filled it with frosting (I used an offset spatula to place white frosting on the sides of the bag and pink frosting in the middle), and excitedly piped my first flower ... but the frosting must have been to soft, because the "flower" came out as a big blob, with no flower definition at all. So I placed my pastry bag (still full of frosting) into the fridge to let it firm up a bit. But I must have left it in the fridge too long because when I attempted to pipe my next flower, the frosting was too hard and wouldn't squeeze through the holes in the tip! *Sigh*

Anyhow, once you get your frosting to the right temperature and piping consistency, the tips do end up piping cute and easy flowers. Once my chocolate cupcakes were baked and cooled (recipe in my book, The Hello Kitty Baking Book!), I started on the decorating. For the "flower bouquet", I piped once flower in the middle ...


... and then piped flowers around the center flower, until the top of the cupcake was full of flowers.


Then I filled in the gaps in between the flowers with green frosting and a leaf tip.


I thought they turned out pretty cute!


The other thing to point out is that every time you refill your piping bag, the placement of the center color may come out differently. In the ones above, the pink isn't really in the middle of the flower, and kind of seeps to one side. Below are the flowers that came out after I refilled my piping bag.


The pink came out more centered and even.


So I suppose if you want flowers that are all consistent, then use a large piping bag (mine are 12-inch) so you can fit more frosting without having to refill.


I've also seen people do only one color, which came out nice as well, and in that case you won't have to worry about the inconsistency in color placement.


Enjoy!


Sunday, August 27, 2017

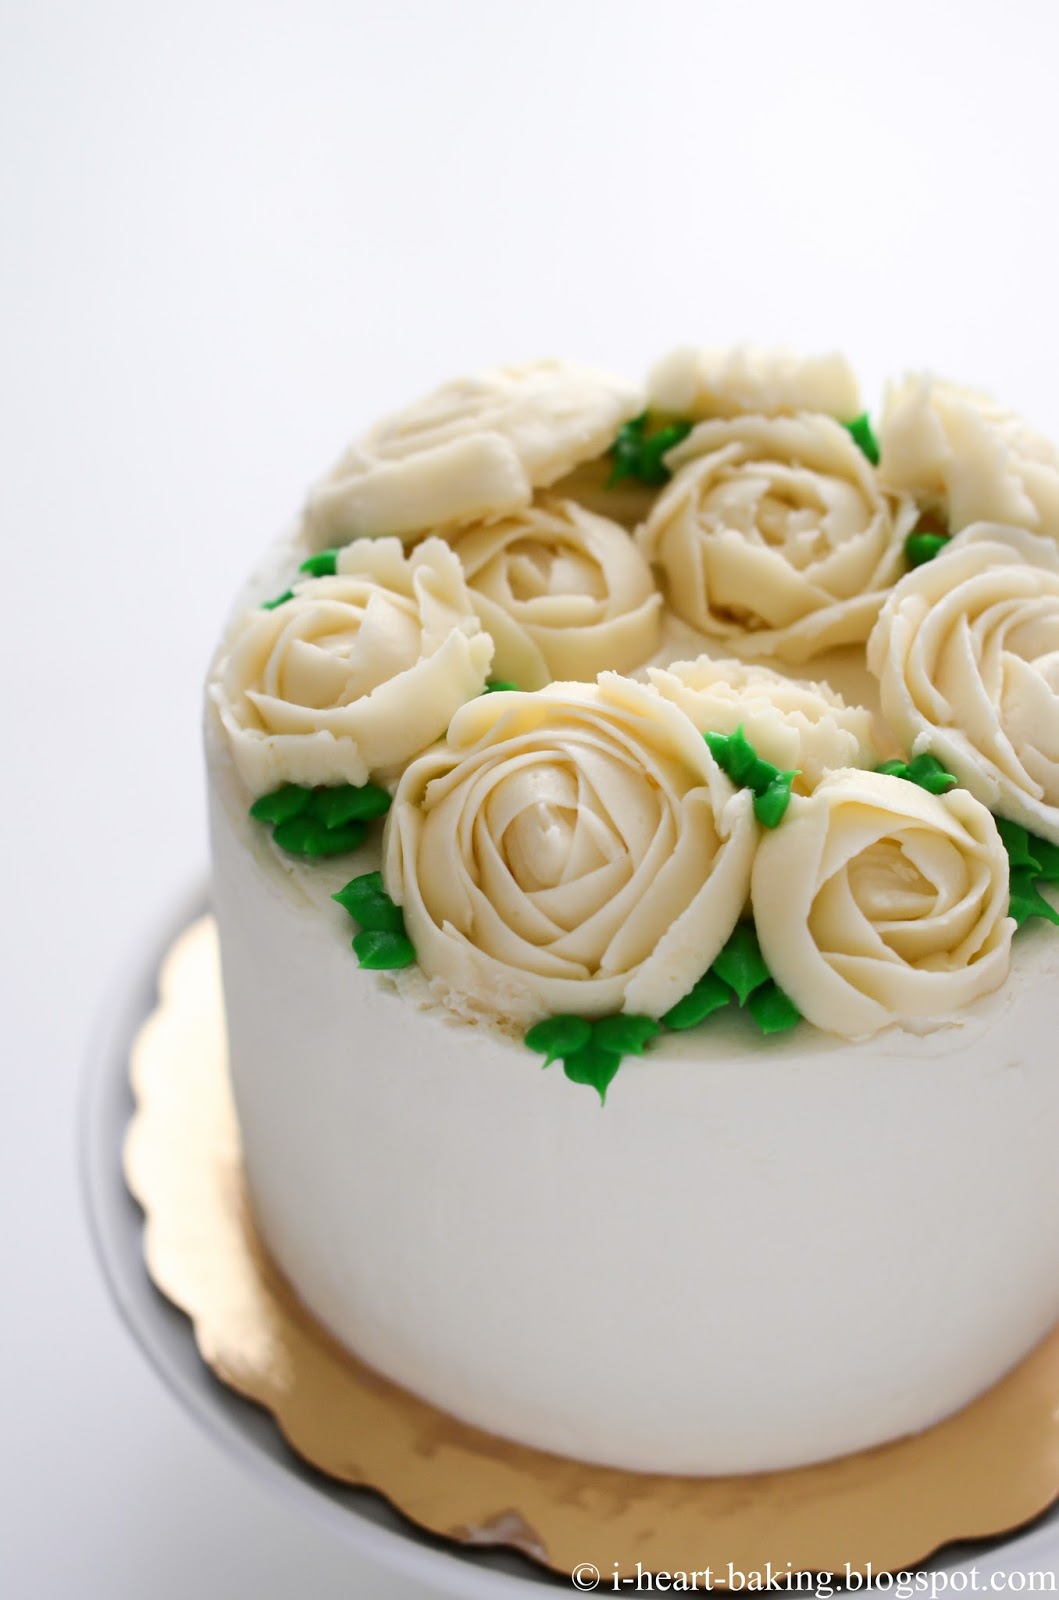
buttercream flower floral wreath cake for mother's day


Last year for Mother's Day, I made a wreath cake with easy pink rosettes for the flowers. It was my first attempt at a floral wreath cake, and since then I've still been longing to make a more complex wreath cake like the ones I've been seeing all over Instagram and Pinterest. So this year for Mother's Day, I decided to make another wreath cake, this time with more realistic piped roses.

The day before making the cake, I prepped by piping out my buttercream roses. For each rose, I took my flower nail, smeared a bit of frosting on it in order to attach a little square of waxed paper that I had cut ahead of time, and then used a piping bag fitted with a petal tip to pipe my rose petals one by one. (You can see this technique on the Wilton website to get a better idea.) Then I pulled the wax paper off of the flower nail, with the rose still on it, and placed it on a small tray which I then immediately placed in the freezer. Once all my roses were done, I placed them all inside an airtight plastic container, which went back into the freezer until the next day.


The next day I made the cake, using my favorite vanilla cake recipe (in my book, The Hello Kitty Baking Book). I only made half the recipe, which with give you two 6-inch round cakes. Once baked and cooled, I sliced each cake in half, giving me four layers of cake. Then I filled them with freshly whipped cream, sliced strawberries, and freshly grated lemon zest.


Next I covered the top and sides of the cake with more whipped cream, and used an offset spatula to smooth it out as best as I could. (I did this twice - first for the crumb coat, and second for the final coat.)


I let it chill in the fridge for about 30 minutes, and then I was ready to add the roses. I started by piping a ring of whipped cream on the top of the cake, for me to nestle my frozen buttercream roses. I placed them on one by one, as quickly as I could so that the roses wouldn't break or melt while I was handling them.


When I was satisfied with the placement of the roses, I put some green buttercream in a piping bag fitted with a leaf tip, and piped little leaves around the roses to fill in the gaps.


And then ... I breathed a sigh of relief. It was done!


I loved the way it turned out! From the color combination of the green leaves against the white flowers, to all-white roses on the all-white cake. It was the perfect floral cake for Mother's Day, and I think it would be great even for a small bridal shower or wedding!


Happy Mother's Day!