Showing posts with label chinese new year. Show all posts

Sunday, January 21, 2018

chickie chinese diakon pastries (lo bo si bing) for chinese new year


Last year for Chinese New Year, we went to my mom's house, where we celebrated with a chinese feast, including my mom's homemade potstickers! (For those of you who have never had a potsticker, it's a dumpling filled with meat and veggies, that is both steamed and pan fried on the stove). For my contribution to the feast, I decided to make one of my favorite chinese pastries, lo bo si bing, which features a flakey pastry crust filled with seasoned daikon (asian turnip or radish). I've been making these for a few years now, but with a crust recipe that I made up, which is much simpler than the traditional complicated chinese pastry dough (which features an inner and outer dough!).

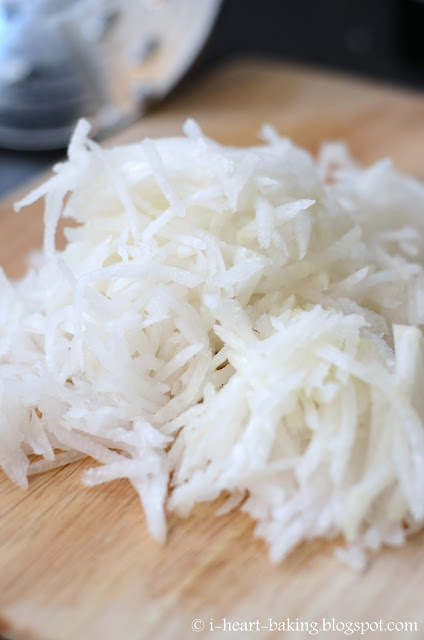
The daikon filling is very simple, it's just peeled shredded diakon (I like to shred it in the food processor with the grater attachment), which is sauteed with minced garlic, salt, white pepper, soy sauce, and chopped green onions. Then be sure to let it cool before filling your pastry.



For the pastry dough recipe, you're going to flip when I tell you what it is. It's basically my all-butter pie crust recipe, except you use vegetable oil instead of butter. Yes, I know it sounds weird. But it works! When my mother-in-law first told me about a similar crust that her friend made for a japanese ube (purple sweet potato) filled pastry, I didn't believe that the crust would come together. But I tried it, mainly because my best friend's daughter is allergic to dairy, and I thought one day I could make her an apple pie that she could actually eat! I didn't have a recipe, so I just tried out my own recipe. And I couldn't believe that it worked!

You basically add vegetable oil to your flour, sugar, and salt, and then the magic is to add ice cold water, which somehow causes the vegetable oil to seize up and turn the mixture into a crust-like consistency! Amazing, right? But the caveat is that you can't roll it out like regular pie crust. You have to kind of pat it into place with your hands. And sometimes it falls apart, but no worries because it's super easy to patch up.


So anyway, back to the diakon pastries :) After making my vegetable oil crust, I used a small ice cream scoop to portion out the dough. With each portion, I rolled it into my hand until it turned into a smooth ball, then flattened it out, and then filled it with my daikon filling before pinching it together and then setting it on my sheet pan with the seam side down.


I brushed the tops with a bit of egg wash, and then sprinkled on some black sesame seeds before baking them at 350F until they turned golden brown.


Aren't they pretty? And so delicious too, you wouldn't think the combination of sauteed diakon and pastry flakey would taste so good!


Since we were celebrating the year of the Rooster, I thought I'd make some of them in the shape of a chickie! So I decorated some of them with black sesame seed eyes, yellow heart beaks, and red heart combs.


I thought they turned out pretty cute!


Here are a few photos of our celebration with the kids, my mom, her sisters, and my cousin and her kids. (And of Miss Melodie helping us wrap homemade potstickers! She did a great job!)

Stay tuned to see what I make this year! Happy Chinese New Year!


Sunday, January 31, 2016

rainbow jello for chinese new year


Almost every year, I make rainbow jello for Chinese New Year. It's so pretty, and festive, and both kids and adults love it! It's a super versatile jello to make and you can make it with any colors you like - I've made it for Valentine's Day, St. Patrick's Day, and Christmas to name a few occasions. I've even made it in egg-shaped jello molds for Easter, or Hello Kitty shaped molds for my book!


For the colored layers, you just need to chose four different colors/flavors of Jello for the different colored layers. And the white layers are made of clear gelatin mixed with sweetened condensed milk for a creamy milky layer in between the fruity layers.


While the recipe itself is super easy, it does take a bit of time to make, because each layer takes at least 30 minutes in the fridge to set before adding the next layer. But it's a fun dessert to make, say on a rainy day, or on a weekend at home, or with your kids!


Plus its a light and not-too-sweet dessert for any meal. Enjoy! And Happy Chinese New Year!

Sunday, August 2, 2015

year of the goat (or ram) cookies


Along with these decorated egg cookies for my friend Selena's red egg and ginger party for her baby, I also made these Goat cookies, since it is the Year of the Goat! I again used my favorite sugar cookie and royal icing recipes, which can be found in my book, The Hello Kitty Baking Book, and for the cookie cutter I had my husband create me another custom copper cutter! He's so handy :)


Selena and I had decided on purple and red for the color of the cookies, since those are "lucky" colors for the Year of the Goat. Once the cookies had baked and cooled, I used stiff purple icing to pipe an outline of the goat, and then filled it in with runny purple icing.


Once that had dried for several hours, I used stiff red icing to pipe the Chinese character for "goat".


I thought they looked pretty cute as-is, but I decided to also add eyes with stiff black icing, which I regretted because afterwards I thought they looked like little dinosaurs instead of goats!


Oh well, they still looked cute :)


Happy one month, little Dominic!


Sunday, September 14, 2014

hello kitty layer jello


If you've read my blog before, you'll probably already know that I have a thing for making rainbow jello. I make it for Valentine's Day, for Chinese New Years, I've even made a green and white version for St. Patrick's Day and an egg-shaped version for Easter! So while I was writing my new book (it comes out next week!!!), I wanted to include a Hello Kitty version, made in cute silicone molds!


You can find the recipe in my new book, The Hello Kitty Baking Book, but it's basically a finger jello made with different flavors of jello, clear gelatine, and a yummy creamy white layer in between the colored layers.


To get the beautiful layers, it does take quite some time (especially if you only have one silicone mold), but the results are striking!


You could do any flavor/color combination you like, and if you can't find the silicone molds you could always make it in a 9x13 pan and use cookie cutters to cut out the shapes.

To get the recipe and see brand new photos, you can order my book here!