My friend Bonnie recently asked me to make a cake for her husband's 40th birthday dinner, and I was excited because I hadn't seen her in years! Among the things that she mentioned about her husband included his love for golf, as well as cherries jubilee ice cream. So I decided to make a chocolate cake filled with cherries jubilee whipped cream filling.
As for the golf theme, I was a little undecided on what I wanted to do with this. Initially we thought that I could pipe the Pebble Beach logo on top of the cake. Or, I could decorate it with white chocolate golf balls, which would look similar to the
golf ball cake pops that I had made a while back. And then, I stumbled accross
this cake at
love & olive oil via
foodgawker - it was such a cute and clean design (and not overly cheesy considering it was a golf ball cake)! I immediately wanted to make it!
Bonnie only needed enough cake for 10 adults, so I made it a 6-inch cake. For the chocolate cake layer, I used my favorite homemade chocolate cake recipe. While that was baking, I started on my filling. I found
this recipe at Epicurious for cherries jubilee, and proceeded the make the cherry sauce. (The only thing that I changed was to add a little bit of corn starch slurry at the end to thicken the sauce.)
I had never had cherries jubilee before so I had no idea what it was supposed to taste like; it ended up tasting like caramelized cherries, but not with an overwhelming cherry taste. So I pureed the sauce, and then mixed a portion of it with cream cheese, to give the filling a bit more tartness. Then I made a batch of whipped cream, which I then folded into the cherry cream cheese mixture.
Once the cake was cooled, I put the first cake layer on an 8-inch cake round, and then piped on a layer of the filling. Then, to add extra cherries jubilee flavor, I brushed on some of the sauce onto the top of the second cake layer, which I then inverted onto the filling layer.
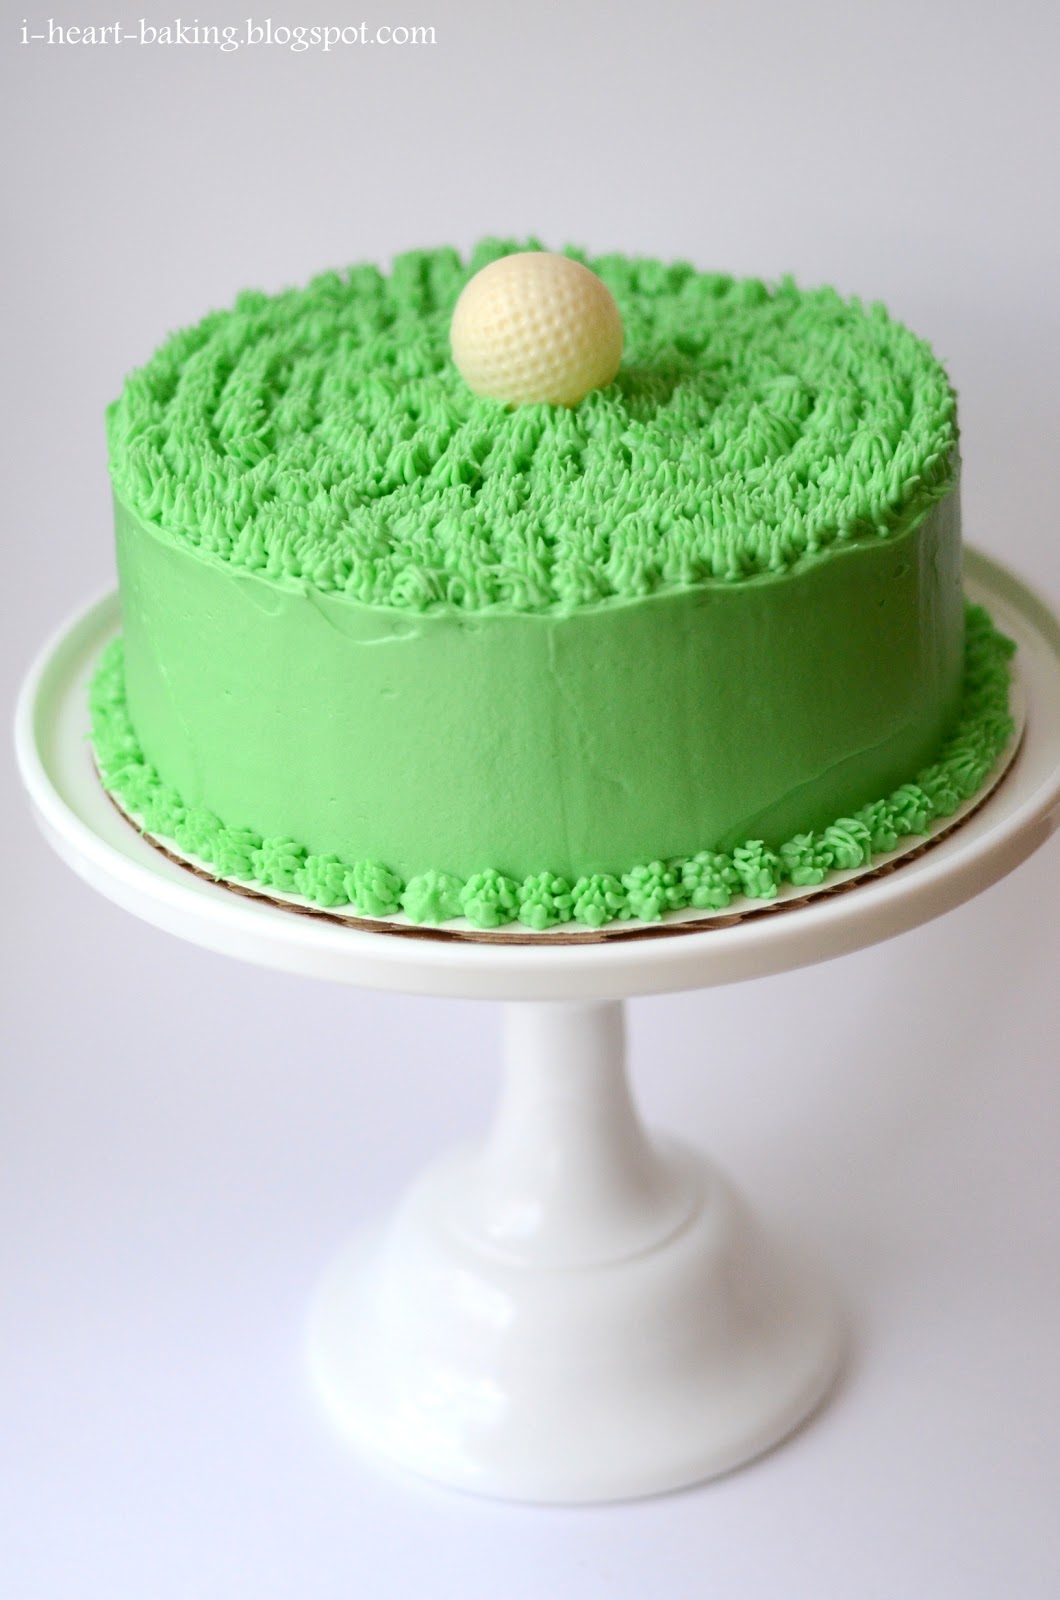
For the frosting, I made a batch of buttercream, and then added a stick of cream cheese to it at the end (as I find regular buttercream too sweet, and I love the tang of cream cheese in a frosting). I added just enough green coloring to suggest the color of grass, and then use an offset spatula to apply the first "crumb coat" layer of frosting.
After letting that set in the fridge for a half hour or so, I applied the final "smooth" layer of frosting. I didn't worry too much about making the top super smooth, as that would end up covered with piped grass.
Then came the fun part. Using a
special tip that has multiple holes, I covered the top of the cake by piping on "grass". And then I piped on a "grass" border on the bottom of the cake as well.
For the golf ball decoration I used white chocolate and this
golf ball candy mold, and I made a few just in case there was any breakage. The first step was to cover the insides of a few of the golf balls of the mold with melted white chocolate, and then placed it in the fridge for them to harden. This would be one half of each golf ball. Once they were set, I popped them out of the mold, and then repeated the step to cover mold in chocolate.
Then, before the chocolate hardened, I topped each one with the other half of the golf ball from step one. This way, the new chocolate would harden with the other half attached to it, to form a complete golf ball. I chose the best looking golf ball out of the ones I had made, and placed it on top of the cake.
The final touch was a little birthday banner that I made out of craft paper, thread, and bamboo skewers - similar to the ones I had made for the
Superman cake and the
Thanksgiving birthday cake. I tried to stick with "manly golf colors" that would go with the color of the cake, but I guess you can only get so manly when it comes to a festive birthday banner!
It was so great to see Bonnie again after so many years, even if it was only for a few minutes when I went to drop off the cake. Happy Birthday to her hubby Dave! Hope everyone enjoyed the cake!
*** Update: Made a second golf ball cake
here! Except this time it was an 8-inch cake and filled with chocolate mousse!